Quantcast
Channel: Steve Gordon
Viewing all 170 articles
Browse latest View live

Introducing My Blog

$
0
0

I’ve been thinking about creating a blog on and off for a year or so. I like the idea of sharing what I learn and if nothing else it gives me somewhere to write stuff down that I might later need. I’ve had a blog before and finding the time and discipline to keep it going was tough. I hope I do better this time around.

It’s mostly going to be about ASP.NET and C# since those are what I work with day to day. It’s an exciting time with the nearing release of ASP.NET Core 1.0 and I’ll be mostly investigating the code and concepts for that product as I use it for new projects. I enjoy learning new things and I want to get as good a grip as possible on how things work and best ways to use this technology. I’ll cover the things I learn as I go.

As far as intro’s go, I think that’ll do. We’ll see how well I keep this up and if I find the time to post.

The post Introducing My Blog appeared first on Steve Gordon.


ASP.NET Identity Core 1.0.0 (Under the Hood)

$
0
0

Let me prefix this post / series of blog posts with two important notes.

  1. I am not a security expert. This series of posts records my own dive into the ASP.NET Identity Core code, publicly available on GitHub which I’ve done for my own self-interest to try and understand how it works and what is available to me as a developer. Do not assume everything I have interpreted to be 100% accurate or any code samples as suitable copy and paste production code.
  2. This is written whilst reviewing source mostly from the 3.0.0-rc1 release tag. I may stray into more recent dev code if implementations have changed considerably, but will try to highlight when I do so. One very important point here is that at the time of writing this post Microsoft have announced a renaming strategy for ASP.NET 5. Due to the brand new codebase this is now being called ASP.NET Core 1.0 and the underlying .NET Core will be .Net Core 1.0. This is going to result in namespace changes. I’ve used the anticipated new namespaces here (and will update if things change again).

Goals of this post / series

My personal reasons for digging into this code in the first place are simply to learn and further my own understanding. I’ll be investigating the sections that interest me and summarising as I do. I’m not sure where my investigations will take me so this may one post or many. I’m blogging about my findings as I hope they may be of interest to others wanting to know more about what happens when using this library in your projects. I’m going to try to edit this together in a readable fashion but I do expect it may be a little jumpy as I focus on the parts of the code I personally wanted to know more about. If you’re reading this blog post and see errors (and I expect there will be some) then please comment or contact me so I can update as appropriate.

Password Basics

I feel that before I go further I should try to explain a few key terms and concepts around password security. There are many more detailed resources which discuss security that go deeper into this but this primer should help when reading the rest of the post. If you know all of this then you may want to skip down to the next section below where I’ll start looking at the ASP.NET Identity code specifically.

With any login system, at a minimum we need to store two key pieces of information. A username and a password. The username uniquely identifies the user within your application and the password is a piece of information that only they should hold, used to verify to the application that they are, who they claim to be. This is the concept of authentication within a software application. In order for our applications to work with users we need to store these pieces of information somewhere so that when the user provides them, the application can look them up and compare them. Very commonly this will involve a database store and in ASP.NET that will likely be an SQL database table.

A simple solution would be to store the username as a string value (VARCHAR) and perhaps do the same for the password. This meets the initial requirement as we can now compare these against what a user provides us and if they match, open the door to the application. But there is a lot more to be considered and the most important element is securing that password from malicious intent. The problem being faced is how to store the password in such a way that it’s not plainly readable to anyone who has, or gains access to the database in which it has been stored. It’s well accepted that people will take the path of least complexity with passwords and often use the same password in many places. They will also likely use the same username where they can (especially if that username is their email address). So the risks go way beyond just your application should a password be compromised. It could well open the door to many other places where your user has also registered.

While some might assume that the database is secure and provides all the safety one needs for their user’s data, recent and numerous data exposures have proven that there are many people out there who can probably get to the database if they want to. I’m not planning to dive into the ways and means of that now but if you want more info check out posts from the likes of Troy Hunt who cover some other security aspects to consider. Even if the database is not compromised storing the passwords in plain text would still be a very poor decision since your internal staff also should not have access to them. A password should be as a user expects and be a secret to themselves only. They should be able to expect that you will take due care and responsibility when working with such a piece of data.

So we now want to store the password in a form that is secure from anyone who is looking at the database table, but we also need to be able to verify the user at a later time by comparing their input, to the password stored for their account. A solution could be reversible encryption where we encrypt the password data when we save it to the database and then decrypt it later to compare it with user input. However that also has concerns and issues, again slightly outside the scope of my intentions for this blog post. The short version being that anything reversible still presents a fair degree of insecurity when it comes to passwords.

This is where the concept of a one way hash comes into the picture. A hash is a mathematically repeatable process whereby we can take the password, put it through hashing and then store that data, instead of a plain text password. The word “repeatable” is important here. The reason hashing works is that if you provide the same text and put it through the same hashing process, the result will always be the same. At login we take the provided password, hash it (using the same algorithm used when the password was first saved to the database) and then compare the hashed value against the stored value. If they match, we have authenticated the user.

The advantages are that if the database is compromised, the hashed value is more secure than plain text. The hash cannot be reversed to generate the original plain text password either. But we’re still not done. With the advent of faster processing, even hashes are breakable. For a start, users commonly use simple and guessable passwords. Attackers can take advantage of that by pre-calculating hash values for common passwords, using the same algorithms that an application might use to create a mapping between potential passwords and hashed passwords. They could then use this against a compromised database and quickly work out many of the passwords being used.

We therefore must again go a step further and try to secure against this. So finally we come to the concept of a salt which adds more complexity and uniqueness to the passwords being hashed. Think of an example where two users choose to use the same exact password for your system. Those passwords when hashed will be identical in the database. This could be valuable information to hackers. Therefore to make things more unique, we use a random set of characters, called a salt. This salt is added to the password so that we get a unique password and therefore unique hash for each user, even if they use the same passwords. This mainly helps defend from the dictionary based attacks as hackers would have to calculate the lookup table once per user with their salt.

Finally we have hashing iterations. Hashing once is a start but with modern computer power it’s pretty fast to generate a lookup table. Iterations help somewhat by making the process more computationally expensive and time consuming. The aim of which is to make hacking a password database too much work vs the potential reward.

ASP.NET Identity and Password Hashing

In Identity 2.0 the hashed password and the salt were stored in separate columns in the database. It was only when I looked at a database for a new ASP.NET Core website that I noticed that there was no salt column and I wondered what was happening (hence this blog post)!

So to understand let’s follow the flow of a registering user with a focus on the password so we can understand what ASP.NET Core Identity 1.0.0 is doing to securely save it to the database (and answer my question – where did the salt column go!)

We start in the AccountController with a call to CreateAsync in the Microsoft.AspNet.Identity.UserManager class passing in an IdentityUser object and the password to be hashed and saved.

After running through any password validators we call on an instance an  IPasswordHasher<TUser> (which is injected into the UserManager when it is first constructed).

The PasswordHasher is constructed with an instance of PasswordHasherOptions. The class PasswordHasherOptions defines the settings used for the password hashing. By default the compatibility mode is set to Identity v3 mode, but if you needed to support V2 and below this can be set in the options. There is also a setting for the iterations to use when creating the hash which by default is set to 10,000. Finally this class defines and creates a static instance of the RandomNumberGenerator object found in the mscorelib.

UserManager.CreateAsync calls the HashPassword method.

The HashPassword method checks the compatibility mode in the options and flows through the appropriate method to handle either V2 and V3 identity. We’ll look at the V3 flow here using HashPasswordV3.

Here is the code…

private byte[] HashPasswordV3(string password, RandomNumberGenerator rng)
{
    return HashPasswordV3(password, rng,
    prf: KeyDerivationPrf.HMACSHA256,
    iterCount: _iterCount,
    saltSize: 128 / 8,
    numBytesRequested: 256 / 8);
}

private static byte[] HashPasswordV3(string password, RandomNumberGenerator rng, KeyDerivationPrf prf, int iterCount, int saltSize, int numBytesRequested)
{
    // Produce a version 3 (see comment above) text hash.
    byte[] salt = new byte[saltSize];
    rng.GetBytes(salt);
    byte[] subkey = KeyDerivation.Pbkdf2(password, salt, prf, iterCount, numBytesRequested);

    var outputBytes = new byte[13 + salt.Length + subkey.Length];
    outputBytes[0] = 0x01; // format marker
    WriteNetworkByteOrder(outputBytes, 1, (uint)prf);
    WriteNetworkByteOrder(outputBytes, 5, (uint)iterCount);
    WriteNetworkByteOrder(outputBytes, 9, (uint)saltSize);
    Buffer.BlockCopy(salt, 0, outputBytes, 13, salt.Length);
    Buffer.BlockCopy(subkey, 0, outputBytes, 13 + saltSize, subkey.Length);
    return outputBytes;
}

Breaking down the parameters of the main overloaded method:

  1. A string representing the password to be hashed
  2. An instance of a RandomNumberGenerator (defined in the mscorelib assembly). I’m not going to delve into how that code works here but the CoreCLR project on GitHub contains the code if you want to take a look for yourself.
  3. A choice of the PRF (pseudorandom function family) to use for the key derivation. In this case HMACSHA256 is the standard for Identity V3
  4. An integer representing the iteration count to use when hashing (coming from the PasswordHasherOptions)
  5. The size (number of bytes) to be used for the salt – 128 bits / 8 to calculate the byte size of 16
  6. The number of bytes for the hashed password – 256 bits / 8 to calculate the byte size of 32

A new byte array is created to hold the 16 byte salt which is generated with a call to GetBytes(salt) on the RandomNumberGenerator. This populates the byte array with 16 random bytes. Then a hashed password is created using PBKDF2 (Password-Based Key Derivation Function 2) key derivation, taking the password, the salt, the PRF of HMACSHA256, the number of iterations to use and the number of bytes required as the length of the hashed password.

We now have a hashed password and the random salt used to generate that password. In earlier versions of identity I saw these being saved into two unique columns inside the database. However with Identity 3.0 / ASP.NET Core Identity 1.0 there is only the PasswordHash column. To save the password and hash a new byte array is created. It is the size of the salt + hashed password + 13 extra bytes used to store some meta data about the hashing which took place. These form a single byte array which will be base64 encoded as a string to save into the database.

Construction of the Final Byte Array

The first byte is a format marker and for Identity 3.0 / ASP.NET Core 1.0.0 this is set to 1 (defined in hex).

The next byte stores the PRF that was used. This is the value of the enum available in Microsoft.AspNetCore.Cryptography.KeyDerivation. This belongs in the ASP.NET DataProtection assembly (source on github)

The next 4 bytes store the iteration count used to generate the hash

The next 4 bytes store the salt size

Notice with each of these items there is a call to WriteNetworkByteOrder, a helper method within the PasswordHasher.


private static void WriteNetworkByteOrder(byte[] buffer, int offset, uint value)
{
    buffer[offset + 0] = (byte)(value >> 24);
    buffer[offset + 1] = (byte)(value >> 16);
    buffer[offset + 2] = (byte)(value >> 8);
    buffer[offset + 3] = (byte)(value >> 0);
}

What this is doing in short is splitting the 32 bit integer into the component bytes using bitwise shifting and then storing those in big-endian (network byte) order into the array.

HashPasswordV3 then copies in the bytes from the salt and the password hash to create the final byte array which is returned to the main HashPassword method. This is converted to a base64 encoded string. This is the string is then written to the to the database.

And there we have it. That’s a fairly deep dive of how passwords are hashed inside ASP.NET Core 1.0.0 identity and then stored in the database.

The post ASP.NET Identity Core 1.0.0 (Under the Hood) appeared first on Steve Gordon.

ASP.NET Core Identity Token Providers – Under the Hood

$
0
0

Next up for my series on ASP.NET Core Identity I was interested in how the Identity library provides a way to create tokens which validate actions such as when a user first registers and we need to confirm their email address. This post took a lot longer to write than I expected it to as there are a lot of potential areas to cover. In the interests of making it reasonably digestible I’ve decided to introduce tokens and specifically look at the registration email confirmation token flow in this post. Other posts may follow as I dig deeper into the code and it’s uses.

As with part 1 let me prefix this post with two important notes.

  1. I am not a security expert. This series of posts records my own dive into the ASP.NET Identity Core code, publically available on GitHub which I’ve done for my own self-interest to try and understand how it works and what is available to me as a developer. Do not assume everything I have interpreted to be 100% accurate or any code samples as suitable production code.
  2. This is written whilst reviewing source mostly from the 3.0.0-rc1 release tag. I may stray into more recent dev code if implementations have changed considerably, but will try to highlight when I do so. One very important point here is that at the time of writing this post Microsoft have announced a renaming strategy for ASP.NET 5. Due to the brand new codebase this is now being called ASP.NET Core 1.0 and the underlying .NET Core will be .NET Core 1.0. This is going to result in namespace changes. I’ve used the anticipated new namespaces here (and will update if things change again).

What are tokens and why do we need them?

Tokens are something that an application or service can issue to a user and which they can later hand back as a way to prove their identity and often their authorisation for an action. We can use tokens in various places where we need to provide a mechanism to confirm something about them, such as that a phone number or email address actually belongs to them. They can also be used in other ways; Slack for example uses tokens to provide a magic sign in link on mobile devices.

Because of these potential uses it’s very important that they be secure and trustworthy since they could present a security hole into your application if used incorrectly. Mechanisms need to be in place to expire old or used tokens to prevent someone else using them should they gain access to them. ASP.NET Identity Core provides some basic tokens via token providers for common tasks. These are used by the default ASP.NET Web Application MVC template for some of the account and user management tasks on the AccountController and ManageController.

Now that I’ve explained what a token is let’s look at how we generate one.

Token providers

To get a token or validate one we use a token provider. ASP.NET Core Identity defines an IUserTokenProvider interface which any token providers should implement. This interface has been kept very simple and defines three methods:

Task<string> GenerateAsync(string purpose, UserManager<TUser> manager, TUser user);

This method will generate a token for a given purpose and user. The token is returned as a string.

Task<bool> ValidateAsync(string purpose, string token, UserManager<TUser> manager, TUser user);

This method will validate a token from a user. It will return true or false, indicating whether the token is valid or not.

Task<bool> CanGenerateTwoFactorTokenAsync(UserManager<TUser> manager, TUser user);

This indicates whether the token from this provider can be used for two factor authentication.

You can register as many token providers into your project as necessary to support your requirements. By default IdentityBuilder has a method AddDefaultTokenProviders() which you can chain onto your AddIdentity call from the startup file in your project. This will register the 3 default providers as per the code below. Token providers need to be registered with the DI container so they can be injected when required.

public virtual IdentityBuilder AddDefaultTokenProviders()
{
	var dataProtectionProviderType = typeof(DataProtectorTokenProvider<>).MakeGenericType(UserType);
	var phoneNumberProviderType = typeof(PhoneNumberTokenProvider<>).MakeGenericType(UserType);
	var emailTokenProviderType = typeof(EmailTokenProvider<>).MakeGenericType(UserType);
	return AddTokenProvider(TokenOptions.DefaultProvider, dataProtectionProviderType)
		.AddTokenProvider(TokenOptions.DefaultEmailProvider, emailTokenProviderType)
		.AddTokenProvider(TokenOptions.DefaultPhoneProvider, phoneNumberProviderType);
}

This code makes use of the TokenOptions class which defines a few common provider names and maintains a dictionary of the available providers, the key of which is the provider name. The value is the type for the provider being registered. The code for AddTokenProvider is as follows.

public virtual IdentityBuilder AddTokenProvider(string providerName, Type provider)
{
	if (!typeof(IUserTokenProvider<>).MakeGenericType(UserType).GetTypeInfo().IsAssignableFrom(provider.GetTypeInfo()))
	{
		throw new InvalidOperationException(Resources.FormatInvalidManagerType(provider.Name, "IUserTokenProvider", UserType.Name));
	}
	Services.Configure<IdentityOptions>(options =>
	{
		options.Tokens.ProviderMap[providerName] = new TokenProviderDescriptor(provider);
	});
	Services.AddTransient(provider);
	return this; 
}

Here you can see that the provider is being added into the ProviderMap dictionary and then registered with the DI container.

Registration email confirmation

Now that I’ve covered what tokens are and how they are registered I think the best thing to do is to take a look at a token being generated and validated. I’ve chosen to step through the process which creates an email confirmation token. The user is sent a link to the ConfirmEmail action which includes the userid and their token as querystring parameters. The user is required to click the link which will then validate the token and then mark their email as confirmed.

Validating the email this way is good practice as it prevents people from registering with or adding mailboxes which do not belong to them. By sending a link to the email address requiring an action from the user before the email is activated, only the true owner of the mailbox can access the link and click it to confirm that they did indeed signup for the account. We are trusting the user’s action based on something secure we have provided to them. Because the tokens are encrypted they are protected against forgery.

Generating the token

ASP.NET Core Identity provides the classes necessary to generate the token to be issued to the user in their link. The actual use of the Identity system to request the token and to include it in the link is managed by the MVC site itself, calling into the Identity API as necessary.

In ASP.NET MVC projects the generation of the confirmation email is optional and it is not enabled by default. However the code is there, but commented out within the AccountController. The UserManager class within Identity provides all the methods needed to call for the generation of a token and to validate it again later on. Once we have the token back from the Identity library we are then able to use that token when we send our activation email.

In our example we can call GenerateEmailConfirmationTokenAsync(TUser user). We pass in the user for which the token will be generated.

public virtual Task<string> GenerateEmailConfirmationTokenAsync(TUser user)
{
	ThrowIfDisposed();
	return GenerateUserTokenAsync(user, Options.Tokens.EmailConfirmationTokenProvider, ConfirmEmailTokenPurpose);
}

GenerateUserTokenAsync requires the user, the name of the token provider to use (pulled from the Identity options) and the purpose for the token as a string. The ConfirmEmailTokenPurpose is a constant string defining the wording to use. In this case it is “EmailConfirmation”.

Each token is expected to carry a purpose so that they can be tied very closely to a specific action within your system. A token for one action would not be valid for another.

public virtual Task<string> GenerateUserTokenAsync(TUser user, string tokenProvider, string purpose)
{
	ThrowIfDisposed();
	if (user == null)
	{
		throw new ArgumentNullException("user");
	}
	if (tokenProvider == null)
	{
		throw new ArgumentNullException(nameof(tokenProvider));
	}
	if (!_tokenProviders.ContainsKey(tokenProvider))
	{
		throw new NotSupportedException(string.Format(CultureInfo.CurrentCulture, Resources.NoTokenProvider, tokenProvider));
	}

	return _tokenProviders[tokenProvider].GenerateAsync(purpose, this, user);
}

After the usual null checks what this boils down to is checking through the dictionary of token providers available to the UserManager based on the tokenProvider parameter passed into the method. Once the provider is found it’s GenerateAsync method is called.

At the moment all of the three default TokenOptions providers are set to use the default token provider so by default the DataProtectionTokenProvider is being called which has the following GenerateAsync method.

public class TokenOptions
{
	public static readonly string DefaultProvider = "Default";
	public static readonly string DefaultEmailProvider = "Email";
	public static readonly string DefaultPhoneProvider = "Phone";

	public Dictionary<string, TokenProviderDescriptor> ProviderMap { get; set; } = new Dictionary<string, TokenProviderDescriptor>();

	public string EmailConfirmationTokenProvider { get; set; } = DefaultProvider;
	public string PasswordResetTokenProvider { get; set; } = DefaultProvider;
	public string ChangeEmailTokenProvider { get; set; } = DefaultProvider;
}

NOTE: This setup is slightly confusing as it appears that certain token providers, although registered would never be called based on the way the options are setup by default. This could be modified by changing the options and I have tried to query why this is setup this way by default.

For now though let’s look at the GenerateAsync method on the DataProtectionTokenProvider.

public virtual async Task<string> GenerateAsync(string purpose, UserManager<TUser> manager, TUser user)
{
	if (user == null)
	{
		throw new ArgumentNullException(nameof(user));
	}
	var ms = new MemoryStream();
	var userId = await manager.GetUserIdAsync(user);
	using (var writer = ms.CreateWriter())
	{
		writer.Write(DateTimeOffset.UtcNow);
		writer.Write(userId);
		writer.Write(purpose ?? "");
		string stamp = null;
		if (manager.SupportsUserSecurityStamp)
		{
			stamp = await manager.GetSecurityStampAsync(user);
		}
		writer.Write(stamp ?? "");
	}
	var protectedBytes = Protector.Protect(ms.ToArray());
	return Convert.ToBase64String(protectedBytes);
}

This method uses a memory stream to build up a byte array with the following elements:

  1. The current UTC time (converted to ticks within the extension method)
  2. The user id
  3. The purpose if not null
  4. The user security stamp if supported by the current user manager. The security stamp is a Guid stored in the database against the user. It gets updated when certain actions take place within the Identity UserManager class and provides a way to invalidate old tokens when an account has changed. The security stamp is changed for example when we change the username or email address of a user. By changing the stamp we prevent the same token being used to confirm the email again since the security stamp within the token will no longer match the user’s current security stamp.

These are then passed to the Protect method on an injected IDataProtector. For this post, going into detail about data protectors will be a bit deep and take me quite far off track. I do plan to look at them more in the future but for now it’s sufficient to say that the data protection library defines a cryptographic API for protecting data. Identity leverages this API from its token providers to encrypt and decrypt the tokens it has generated.

Once the protected bytes are returned they are base64 encoded and returned.

Validating the token

Once the user clicks on the link in their confirmation email it will take them to the ConfirmEmail action in the AccountController. That action takes in the userid and the code (protected token) from the link. This action will then call the ConfirmEmailAsync method on the UserManager which in turn will call a VerifyUserTokenAsync method. This method will get to appropriate token provider from the ProviderMap and call the ValidateAsync method.

Let’s step through the code which validates the token on the DataProtectorTokenProvider.

public virtual async Task<bool> ValidateAsync(string purpose, string token, UserManager<TUser> manager, TUser user)
{
	try
	{
		var unprotectedData = Protector.Unprotect(Convert.FromBase64String(token));
		var ms = new MemoryStream(unprotectedData);
		using (var reader = ms.CreateReader())
		{
			var creationTime = reader.ReadDateTimeOffset();
			var expirationTime = creationTime + Options.TokenLifespan;
			if (expirationTime < DateTimeOffset.UtcNow)
			{
				return false;
			}

			var userId = reader.ReadString();
			var actualUserId = await manager.GetUserIdAsync(user);
			if (userId != actualUserId)
			{
				return false;
			}
			var purp = reader.ReadString();
			if (!string.Equals(purp, purpose))
			{
				return false;
			}
			var stamp = reader.ReadString();
			if (reader.PeekChar() != -1)
			{
				return false;
			}

			if (manager.SupportsUserSecurityStamp)
			{
				return stamp == await manager.GetSecurityStampAsync(user);
			}
			return stamp == "";
		}
	}
	// ReSharper disable once EmptyGeneralCatchClause
	catch
	{
		// Do not leak exception
	}
	return false;
}

The token is first converted from the base64 string representation to a byte array. It is then passed to the IDataProtector to be decrypted. Once again the details of how this works are too detailed for this post. The decrypted contents are passed into a new memory stream to be read.

The creation time is first read out from the start of the token. The expiration time is calculated by taking the token creation time and adding the token lifespan defined in the DataProtectionTokenProviderOptions. By default this is set at 1 day. If the token has expired then the method returns false since it is no longer considered a valid token.

It then reads the userId string and compares it to the id of the user (this is based on the userId from the link they get sent in their email. The account controller first uses that id to load up a user from the database. This ensures that the token belongs to the user who is attempting to use it.

It next reads the purpose and checks that it matches the purpose for the validation that is occurring (this will be passed into the method by the caller). This ensures a token is valid against only a specific function.

It then reads in the security stamp and stores it in a local variable for use in a few moments.

It then calls PeekChar which tries to get (but not advance) the next character from the token. Since we should be at the end of the stream here it checks for -1 which indicates no more characters are available. Any other value indicates that this token has extra data and is therefore not valid.

Finally, if security stamps are supported by the current user manager the security stamp for the user is retrieved from the user store and compared to the stamp it read from the token. Assuming they match then we can now confirm that the token is indeed valid and return that response to the caller.

Other token providers

In addition to the DataProtectionTokenProvider there are other providers defined within the Identity namespace. As far as I can tell these are not yet used based on the way the options are setup. I have actually queried this in an issue on the Identity repo. It may still be an interesting exercise for me to dig into how they work and differ from the DataProtectionTokenProvider. There is also the concept of an SMS verification token in the default ManageController for a default MVC application which doesn’t use a token provider directly

It would also be quite simple to implement your own token provider if you need to implement some additional functionality or store additional data within the token.

The post ASP.NET Core Identity Token Providers – Under the Hood appeared first on Steve Gordon.

How to Send Emails in ASP.NET Core 1.0

$
0
0

ASP.NET Core 1.0 is a reboot of the ASP.NET framework which can target the traditional full .NET framework or the new .NET Core framework. Together ASP.NET Core and .NET Core have been designed to work cross platform and have a lighter, faster footprint compared to the current full .NET framework. Many of the .NET Core APIs are the same as they are in the full framework and the team have worked hard to try and keep things reasonably similar where it makes sense and is practical to do so. However, as a consequence of developing a smaller, more modular framework of dependant libraries and most significantly making the move to support cross platform development and hosting; some of libraries have been lost. Take a look at this post from Immo Landwerth which describes the changes in more detail and discusses considerations for porting existing applications to .NET Core.

I’ve been working with ASP.NET Core for quite a few months now and generally I have enjoyed the experience. Personally I’ve hit very few issues along the way and expect to continue using the new framework going forward wherever possible. Recently though I did hit a roadblock on a project at work where I had a requirement to send email from within my web application. In the full framework I’d have used the SmtpClient class in system.net.mail namespace. However in .NET Core this is not currently available to us.

Solutions available in the cloud world include services such as SendGrid; which, depending on the scenario I can see as a very reasonable solution. For my personal projects and tests this would indeed be my preferred approach, since I don’t have to worry about maintaining and supporting an SMTP server. However at work we have SMTP systems in place and a specialised support team who manage them, so I ideally needed a solution to allow me to send emails directly as we do in our traditionally ASP.NET 4.x applications.

As with most coding challenges I jumped straight onto Google to see who else had had this requirement and how they solved the problem. However I didn’t find as many documented solutions that helped me as I was expecting to. Eventually I landed on this issue within the corefx repo on Github. That led me onto the MailKit library maintained by Jeffrey Stedfast and it turned out to be a great solution for me as it has recently been updated to work on .NET Core.

In this post I will take you through how I got this working for the two scenarios I needed to tackle. Firstly sending mail directly via an SMTP relay and secondly the possibility to save the email message into an SMTP pickup folder. Both turned out to be pretty painless to get going.

Adding MailKit to your Project

The first step is to add the reference to the NuGet package for MailKit. I now prefer to use the project.json file directly to setup my dependencies. You’ll need to add the MailKit library – which is at version 1.3.0-beta6 at the time of writing this post – to your dependencies section in the project.json file.

On a vanilla ASP.NET Core web application your dependencies should look like this:

Dependancies

Once you save the change VS should trigger a restore of the necessary NuGet packages and their dependencies.

Sending email via a SMTP server

I tested this solution in a default ASP.NET Core web application project which already includes an IEmailSender interface and a class AuthMessageSender which just needs implementing. It was an obvious choice for me to test the implementation using this class as DI is already hooked up for it. For this post I’ll show the bare bones code needed to get started with sending emails via an SMTP server.

To follow along, open up the MessageServices.cs file in your web application project.

We need three using statements at the top of the file.

using MailKit.Net.Smtp;
using MimeKit;
using MailKit.Security;

The SendEmailAsync method can now be updated as follows:

public async Task SendEmailAsync(string email, string subject, string message)
{
	var emailMessage = new MimeMessage();

	emailMessage.From.Add(new MailboxAddress("Joe Bloggs", "jbloggs@example.com"));
	emailMessage.To.Add(new MailboxAddress("", email));
	emailMessage.Subject = subject;
	emailMessage.Body = new TextPart("plain") { Text = message };

	using (var client = new SmtpClient())
	{
		client.LocalDomain = "some.domain.com";                
		await client.ConnectAsync("smtp.relay.uri", 25, SecureSocketOptions.None).ConfigureAwait(false);
		await client.SendAsync(emailMessage).ConfigureAwait(false);
		await client.DisconnectAsync(true).ConfigureAwait(false);
	}
}

First we declare a new MimeMessage object which will represent the email message we will be sending. We can then set some of it’s basic properties.

The MimeMessage has a “from” address list and a “to” address list that we can populate with our sender and recipient(s). For this example I’ve added a single new MailboxAddress for each. The basic constructor for the MailboxAddress takes in a display name and the email address for the mailbox. In my case the “to” mailbox takes the address which is passed into the SendEmailAsync method by the caller.

We then add the subject string to the email message object and then define the body. There are a couple of ways to build up the message body but for now I’ve used a simple approach to populate the plain text part using the message passed into the SendEmailAsync method. We could also populate a Html body for the message if required.

That leaves us with a very simple email message object, just enough to form a proof of concept here. The final step is to send the message and to do that we use a SmtpClient. Note that this isn’t the SmtpClient from system.net.mail, it is part of the MailKit library.

We create an instance of the SmtpClient wrapped with a using statement to ensure that it is disposed of when we’re done with it. We don’t want to keep connections open to the SMTP server once we’ve sent our email. You can if required (and I have done in my code) set the LocalDomain used when communicating with the SMTP server. This will be presented as the origin of the emails. In my case I needed to supply the domain so that our internal testing SMTP server would accept and relay my emails.

We then asynchronously connect to the SMTP server. The ConnectAsync method can take just the uri of the SMTP server or as I’ve done here be overloaded with a port and SSL option. For my case when testing with our local test SMTP server no SSL was required so I specified this explicitly to make it work.

Finally we can send the message asynchronously and then close the connection. At this point the email should have been fired off via the SMTP server.

Sending email via a SMTP pickup folder

As I mentioned earlier I also had a requirement to drop a message into a SMTP pickup folder running on the web server rather than sending it directly through the SMTP server connection. There may well be a better way to do this (I got it working in my test so didn’t dig any deeper) but what I ended up doing was as follows:

public async Task SendEmailAsync(string email, string subject, string message)
{
	var emailMessage = new MimeMessage();

	emailMessage.From.Add(new MailboxAddress("Joe Bloggs", "jbloggs@example.com"));
	emailMessage.To.Add(new MailboxAddress("", email));
	emailMessage.Subject = subject;
	emailMessage.Body = new TextPart("plain") { Text = message };

	using (StreamWriter data = System.IO.File.CreateText("c:\\smtppickup\\email.txt"))
	{
		emailMessage.WriteTo(data.BaseStream);
	}
}

The only real difference from my earlier code was the removal of the use of SmtpClient. Instead, after generating my email message object I create a steamwriter which creates a text file on a local directory. I then used the MimeMessage.WriteTo method passing in the base stream so that the RFC822 email message file is created in my pickup directory. This is picked up and sent via the smtp system.

Summing Up

MailKit seems like a great library and it’s solved my immediate requirements. There are indications that the Microsoft team will be working on porting their own SmtpClient to support ASP.NET Core at some stage but it’s great that the community have solved the problem for those adopting / testing .NET Core now.

The post How to Send Emails in ASP.NET Core 1.0 appeared first on Steve Gordon.

Contributing to allReady

$
0
0

In this post I want to discuss a fantastic open source project called allReady that I highly encourage all ASP.NET developers to check out. I want to share my early experience with allReady and how I got started with contributing to an open source project for the first time.

What is allReady?

allReady is project developed and managed by the charity organisation Humanitarian Toolbox. It is designed to assist management of community preparedness campaigns, bringing together the campaign organisers and volunteers to make managing the campaign easier and more efficient for all involved. It’s currently in a private preview release and is being trialled and tested by the American Red Cross with a campaign to install smoke alarms within homes in the Chicago area. Once the pilot is completed it will be available for many other important campaigns.

The project is developed using ASP.NET Core 1.0 (formerly ASP.NET 5) and uses Entity Framework Core (formerly EF7) for data access. It’s live preview sites are hosted in Microsoft Azure.

To summarise the functionality; allReady is a web application which hosts campaigns and their associated activities. The public can view campaigns and volunteer to help with activities where they have the appropriate skills. Activities may have goals such as to install a certain number of smoke alarms in a given area by a certain date. Campaign organisers can assign tasks to the volunteers and track the progress of the activity that has taken place. By managing the tasks in this way it allows the most suitable resources to be aligned with the work required.

Contributing to allReady

I first heard about the project a few months ago on the DotNetRocks podcast, hosted by Carl Franklin and Richard Campbell and it sounded interesting. I headed over to the Humanitarian Toolbox website and their allReady GitHub repository to take a deeper look. Whilst I had played around with some features of ASP.NET Core and read/watched a fair amount about it, I’d yet to work with a full ASP.NET Core project. So I started by spending some time looking at the code on GitHub and working out how it was put together.

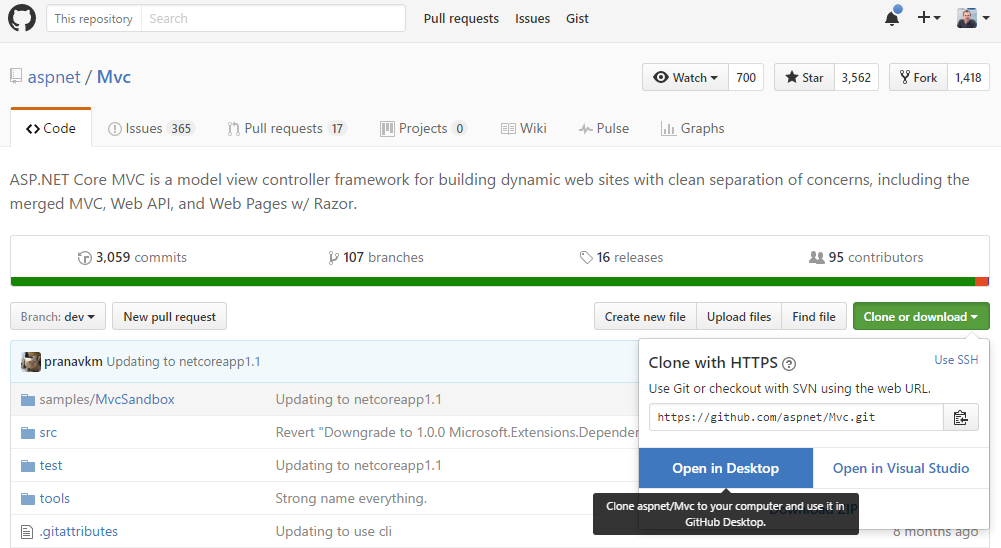
I then spent a bit of time looking through the issues, both closed ones and new ones to get a feel for the direction of the project and the type of work being done. It was clear to me at this point that I wanted to have a go at contributing, but having never even forked anything on GitHub I was a bit unsure of how to get started. I must admit it took me a few weeks before I decided to bite the bullet and have a go with my first contribution. I was a little intimidated to start using GitHub and jumping into an established project. Fortunately the GitHub readme document for allReady gave some good pointers and I spent a bit of time on Google learning how to fork and clone the repository so that I could work with the code.

I was going to spend some time in this post going through the more detailed steps of how to fork a repository and start contributing but in January Dave Paquette posted an extensive blog post covering this in fantastic detail. If you want a great introduction to GitHub and open source contributions I highly recommend that you start with Dave’s post.

It can be a bit daunting knowing where to start and opening your code up to public review – certainly that’s how I felt. I personally wasn’t sure if my code would be good enough and didn’t want to make any stupid mistakes, but after cloning down the code and playing around on my local machine I started to feel more confident about making some changes and trying my first pull request.

I took a look through the open issues and tried to find something small that I felt I could tackle for my first pull request. I wanted something reasonably simple to begin with while I learned the ropes. I found an issue requiring some UI text to display the password requirements for new account registrations so I started working on the code for that. I got it compiling locally, ran the tests and submitted my first pull request (PR). Well done me!

It was promptly reviewed by MisterJames (aka James Chambers) who welcomed me to the project. At this point it’s fair to say that I’d gone a bit off tangent with my PR and it wasn’t quite right for what was needed. Being brutally honest, it wasn’t great code either. James though was very kind in his feedback and did a good of explaining that although it wasn’t quite right for the issue at hand, he’d be able to help me adjust it so that it was. An offer of some time to work remotely on the code wasn’t at all what I hadn’t expected and was very generous. James very quickly put some of my early fears to rest and I felt encouraged to continue contributing.

The importance of this experience should not be underestimated, since I’m sure that a lot of people may feel worried about making a pull request that is wrong either in scope or technically. My experience though quickly put me at ease and made it easy to continue contributing and learning as I went. The team working on allReady do a great job of welcoming and inducting new contributors to the project. While my code was not quite right for the requirement, I wasn’t made to feel rejected  or humiliated and help was offered to make my code more suitable. If you’re looking for somewhere friendly to start out with open source, I can highly recommend allReady.

Since then I’ve made a total of 23 pull requests (PRs) on the project 22 of which are now closed and merged into the project. After my first PR I picked up some more issues that I felt I could tackle, including a piece of work to rename some of the entities and classes around a more relevant ubiquitous language. It’s really rewarding to have code which you’ve contributed make up part of an open source project and I feel it’s even better when it’s for such a good cause. As my experience with the codebase, including working with ASP.NET Core has developed I have been able to pick up larger and more complex issues. I continue to learn as I go and hopefully get better with each new pull request.

Challenges

Some people will be worried about starting out with open source contributions, but honestly I’ve had no bad experiences with the allReady project. I do want to discuss a couple of areas that could be deemed challenging and perhaps are things which might be putting others off from contributing. I hope in doing so I can set any concerns people may have aside.

The area that I found most technically challenging early on was working with Git and GitHub. I’d only recently been exposed to Git at work and hadn’t yet learned how to best use the commands and processes. I’d never worked with GitHub so that was brand new to me too. Rebasing was the area that as first was a bit confusing and daunting for me. This post isn’t intended to be a full git or rebasing tutorial but I did feel it’s worth briefly discussing what I learned in this area since others may be able to use this when getting started with allReady.

Rebasing 101

Rebasing allows us to take commits which have been made by other authors (or yourself on other branches) and replay our commits on top of them. It allows us to keep the base of our work up-to-date and ensure that any merge conflicts are handled before a pull request is submitted/accepted.

I follow the practice of creating a branch for each issue which I start work on. This allows me to keep that work separate and is also required in order to submit a pull request on GitHub. Given that a feature might take a number of days to complete, it’s likely that the project master branch will have moved on by the time you are ready to submit your PR. You could pull in the master branch changes and then merge them into your branch but this leads to a quite messy commit history and in the case of one of my PRs, didn’t work well at all. Rebasing is your friend here and by rebasing your issue branch on top of the up-to-date master you can ensure that the commit timeline is correct and that all of your changes work with the latest code. There are occasions where you’ll need to handle conflicts as the rebase occurs, but often a rebase can be a pretty simple exercise.

Dave Paquette’s post which I highlighted earlier covers all of this, so I recommend you read that for some great guidance first. I thought it might be useful to share my cheat sheet that I noted down a few months ago and which I personally found handy in the early days until I had memorised the flow of commands. Out of context these may not make sense to Git newcomers but hopefully after reading Dave’s guide you may find these a nice quick reference to have to hand.

git checkout master
git fetch htbox
git merge htbox/master
git checkout issue-branch-1
git rebase master
git push origin issue-branch-1 -f

To summarise what these do:

First I checkout the master branch and fetch any changes from the htbox remote, merging them into my master branch. This brings my local repository up-to-date with the project code on GitHub. When working with a GitHub project you’ll likely setup two remotes. One is to your forked GitHub repository (origin in my case) and one is to the main project repository (which I named htbox). The first three commands above will update my local master branch to reflect the current project master branch.

I then checkout my issue branch in which I have completed my work for the issue. I then rebase from my updated local master branch. This will rewind your issue branch’s changes, update with the master branch commits and then reply each of your branch’s commits onto the updated base (hence the term rebasing). If any of your commits conflict with the master’s changes then you will have to handle those merge conflicts before the rebase operation can continue.

Finally, once my issue branch is rebased, my feature re-tested to ensure that it still works as expected and then unit tests all running green I can push my branch up to my forked repository hosted on GitHub. I tend to push only my specific issue branch and will sometimes require the -f force flag to ensure that the remote fork takes all of my changes exactly as they appear locally. Forcing is most common in cases where I’m updating an existing PR and have had to rebase a second time based on more changes to the master branch.

This leaves me ready to submit a pull request or, if I already have a PR submitted for my branch, GitHub will update that existing PR with my new commits. The project team will be happy as this will make accepting and merging the PR an easier task after the rebase as any conflicts with the current master will have been resolved.

Whilst understanding the steps required to rebase was a learning curve for me, it was in the end, easier than I had feared it might be. Certainly if you’re familiar with Git before you start then you’ll have an easier time, but I wouldn’t let it put you off if you’re a complete newcomer. It is in fact a great chance to learn Git which will surely be useful in future projects.

Finding Time

Another challenge that I feel worth mentioning, since I’m sure many will consider it true for them too, is finding time to work on the project. Life is busy and personally finding time to work on the code isn’t always that easy for me. I don’t have children, so I do have more time than those with little ones to take care of, but outside of work I like to socialise with friends, run a side photography business with my wife, play sports and enjoy the outdoors. All things which consume most of my spare time. However I really enjoy being a part of this project and so when I do find myself with spare time, often early in the morning before work, during the weekend or sometimes even during my lunch break, I try to tackle an issue for allReady. There are a range of open issues, some large in scope, some smaller; so often you can often find something that you can make time to work on. No one puts pressure on the completion of work and I believe everyone is very appreciative of any time people are able to contribute. I do recommend that you be realistic in what you can tackle but certainly don’t be put off if you’ll pick up pieces of work as and when you can. If you do start something but find yourself out of time, I recommend you leave a short comment on the issue so that other contributors know what’s happening and when you might be able to pick it up again.

Sometimes, with larger issues it might make sense for them to be broken down into sub issues, so that PR’s can be submitted for smaller pieces of work. This allows the larger goals to be achieved but in a more manageable way. If you see something that you want to help with, leave a comment and start a discussion. Again the team are very approachable and quick to respond to any questions and comments you may have.

Time is valuable to us all and therefore it’s a great thing to donate when you can. Sharing a little time here and there on a project such as allReady can be really precious, and however small a contribution, it’s sure to be gratefully received.

Benefits

Having touched on a few possible challenges I wanted to move onto the benefits of contributing which I think far outweigh those challenges.

Firstly and in my opinion, most importantly, there is the fact that any contribution will be towards an application that will be helping others. If you have time to give an open source project, this is one which really does represent a very worthwhile cause. One of the goals of Humanitarian Toolbox is to allow those with software development skills to put their knowledge and experience directly towards charitable goals. It’s great to be able to use my software development skills in this way.

Secondly it’s a great learning experience for both new and experienced developers. With ASP.NET Core in RC1 currently and RTM perhaps only a few more months away this is a great opportunity to work with the new framework and to learn in a practical way. Personally I’ve learnt a lot along the way, including seeing the Mediatr library being used. I really like the command/query pattern for data access and I have already used it on a work project. There are a number of experienced developers on the team and I learn a lot from the code reviews on my pull requests and watching their commits.

Thirdly, it’s a very friendly project to be involved with. The team have been great and I’ve felt very welcomed and involved in the project. Some of the main contributors are now part of the .NET monsters on Channel 9. It’s great to work with people who really know their stuff. This makes it a great place to start out with open source contributions, even with no prior experience contributing on GitHub.

Code-a-thon

On the 20th February Humanitarian Toolbox held a code-a-thon at two physical locations in the US and Canada as well as some remote contributions from others on the project. I set aside my day to work on some issues from the UK. It was great being part of a wider event, even if remote. I recommend that you follow @htbox on twitter for news of any future events that you can take part in. If you’re close enough to take part physically then it looked like good fun during the live link up on Google Hangouts. As well as the allReady project people were contributing to other applications with charitable goals such as a missing children’s app for Minnesota. You can read more about the event in Rocky Lhotka’s blog post.

How you can help and get started?

No better way than to jump into the GitHub project and start contributing. Even non developers can get involved by helping test the application, raising any issues that they experience and providing suggestions for improvements. If you have C# and ASP.NET experience I’m sure you’ll quickly get up to speed after checking out the codebase. If you’re looking for good issues to ease in with then check out any tagged with the green jump-in label. Those are smaller, simpler issues that are great for newcomers to the project or to GitHub in general. Once you’ve done a few fixes and pull requests for those issues you’ll be ready to take a look at some of the more complex issues.

If you need help with getting started or are unsure how of how to contribute then the team will be sure to offer help and advice along the way.

Summary of links

As I’ve mentioned and included quite a lot of links in this post, here’s a quick roundup and a few others I thought would be useful:

http://htbox.org

http://htbox.github.io/

http://www.davepaquette.com/archive/2016/01/24/Submitting-Your-First-Pull-request.aspx

https://github.com/htbox/allready

https://www.youtube.com/channel/UCMHQ4xrqudcTtaXFw4Bw54Q – Community Standup Videos

http://www.lhotka.net/weblog/HTBoxTwinCitiesCodeathonFeb2016Recap.aspx

The post Contributing to allReady appeared first on Steve Gordon.

Extending the ASP.NET Core 1.0 Identity SignInManager

$
0
0

So far I have written a couple of posts in which I dive into the code for the ASP.NET Core 1.0 Identity library. In this post I want to do something a little more practical and look at extending the default identity functionality. I’m working on a project at the moment which will be very reliant on a strong user management system. As I move forward with that and build up the requirements I will need to handle things not currently available in the Identity library. Something missing from the current Identity library is user security auditing, an important feature for many real world applications where compliance auditors may expect such information to be available.

Before going further, please note that this code is not final, production ready code. At this stage I want to prove my concept and meet some initial requirements that I have. I expect I’ll end up extending and refactoring this code as my project develops. Also, at the time of writing ASP.NET Core 1.0 is at release candidate 1. We can expect some changes in RC2 and RTM which may require this code to be adjusted. Feel free to do so, but copy and paste at your own risk!

At this stage in my project, my immediate requirement is to store successful login, failed login and logout events in an audit table within my database. I would like to collect the visitor IP address also. This data might be useful after some kind of security breach; for example to review who was logged into the system as well as where from. It would also allow for some analysis of who is using the application and how often / at what times of day. Such data may prove useful to plan upgrades or to encourage more use of the application. Remember that if you record this information, particularly within a public facing SaaS style application, you may well need to include details of what you’re data recording and why, in your privacy policy.

I could implement this auditing functionality within my controllers. For example I could update the Login action on the Account controller to write into an audit table directly. However I don’t really like that solution. If anyone implements a new controller/action to handle login or logout then they would need to remember to also add code to update the audit records. It makes the Login action method more responsible than it should be for performing the audit logic, when really this belongs deeper in the application.

If we take a look at the Login action on the Account controller we can see that it calls into an instance of a SignInManager. In a default MVC application this is setup in the dependency injection container by the call to AddIdentity within the Startup.cs class. The SignInManager provides the default implementations of sign in and sign out logic. Therefore this is a better candidate in which to override some of those methods to include my additional auditing code. This way, any calls to the sign in manager, from any controller/action will run my custom auditing code. If I need to change or extend my audit logic I can do so in a single class which is ultimately responsible for handling that activity.

Before doing anything with the SignInManager I needed to define a database model to store my audit records. I added a UserAudit class which defines the columns I want to store:

public class UserAudit
{
	[Key]
	public int UserAuditId { get; private set; }

	[Required]
	public string UserId { get; private set; }

	[Required]
	public DateTimeOffset Timestamp { get; private set; } = DateTime.UtcNow;

	[Required]
	public UserAuditEventType AuditEvent { get; set; }

	public string IpAddress { get; private set; }   

	public static UserAudit CreateAuditEvent(string userId, UserAuditEventType auditEventType, string ipAddress)
	{
		return new UserAudit { UserId = userId, AuditEvent = auditEventType, IpAddress = ipAddress };
	}
}

public enum UserAuditEventType
{
	Login = 1,
	FailedLogin = 2,
	LogOut = 3
}

In this class I’ve defined an Id column (which will be the primary key for the record), a column which will store the user Id string, a column to store the date and time of the audit event, a column for the UserAuditEventType which is an enum of the 3 available events I will be auditing and finally a column to store the user’s IP address. Note that I’ve made the UserAuditId a basic auto-generated integer for simplicity in this post, however in my final code I’m very likely going to use fluent mappings to make a composite primary key based on user id and the timestamp instead.

I’ve also included a static method within the class which creates a new audit event record by taking in the user id, event type and the ip address. For a class like this I prefer this approach versus exposing the property setters publically.

Now that I have a class which represents the database table I can add it to the entity framework DbContext:

public class ApplicationDbContext : IdentityDbContext<ApplicationUser>
{
	public DbSet<UserAudit> UserAuditEvents { get; set; }
}

At this point, I have a new table defined in code which needs to be physically created in my database. I will do this by creating a migration and applying it to the database. As of ASP.NET Core 1.0 RC1 this can be done by opening a command prompt from my project directory and then running the following two commands:

dnx ef migrations add “UserAuditTable”

dnx ef database update

This creates a migration which will create the table within my database and then runs the migration against the database to actually create it. This leaves me ready to implement the logic which will create audit records in that new table. My first job is to create my own SignInManager which inherits from the default SignInManager. Here’s what that class looks like before we extend the functionality:

public class AuditableSignInManager<TUser> : SignInManager<TUser> where TUser : class
{
	public AuditableSignInManager(UserManager<TUser> userManager, IHttpContextAccessor contextAccessor, IUserClaimsPrincipalFactory<TUser> claimsFactory, IOptions<IdentityOptions> optionsAccessor, ILogger<SignInManager<TUser>> logger)
		: base(userManager, contextAccessor, claimsFactory, optionsAccessor, logger)
	{
	}
}

I define my own class with it’s constructor inheriting from the base SignInManager class. This class is generic and requires the type representing the user to be provided. I also have to implement a constructor, accepting the components which the original SignInManager needs to be able to function. I pass these objects into the base constructor.

Before I implement the logic and override some of the SignInManager’s methods I need to register this custom SignInManager class with the dependency injection framework. After checking out a few sources I found that I could simply register this after the AddIdentity services extension in my StartUp.cs class. This will then replace the SignInManager previously registered by the Identity library.

Here’s what my ConfigureServices method looks like with this code added:

public void ConfigureServices(IServiceCollection services)
{
	// Add framework services.
	services.AddEntityFramework()
		.AddSqlServer()
		.AddDbContext<ApplicationDbContext>(options =>
			options.UseSqlServer(Configuration["Data:DefaultConnection:ConnectionString"]));

	services.AddIdentity<ApplicationUser, IdentityRole>()
		.AddEntityFrameworkStores<ApplicationDbContext>()
		.AddDefaultTokenProviders()
		.AddUserManager<AuditableUserManager<ApplicationUser>>();

	services.AddScoped<SignInManager<ApplicationUser>, AuditableSignInManager<ApplicationUser>>();

	services.AddMvc();

	// Add application services.
	services.AddTransient<IEmailSender, AuthMessageSender>();
	services.AddTransient<ISmsSender, AuthMessageSender>();
}

The important line is services.AddScoped<SignInManager<ApplicationUser>, AuditableSignInManager<ApplicationUser>>(); where I specificy that whenever a class requires a SignInManager<ApplicationUser> the DI container will return our custom AuditableSignInManager<ApplicationUser> class. This is where dependency injection really makes life easier as I don’t have to update multiple classes with concreate instances of the SignInManager. This one change in my startup.cs file will ensure that all dependant classes get my custom SignnManager.

Going back to my AuditableSignInManager I can now make some changes to implement the auditing logic I require.

public class AuditableSignInManager<TUser> : SignInManager<TUser> where TUser : class
{
	private readonly UserManager<TUser> _userManager;
	private readonly ApplicationDbContext _db;
	private readonly IHttpContextAccessor _contextAccessor;

	public AuditableSignInManager(UserManager<TUser> userManager, IHttpContextAccessor contextAccessor, IUserClaimsPrincipalFactory<TUser> claimsFactory, IOptions<IdentityOptions> optionsAccessor, ILogger<SignInManager<TUser>> logger, ApplicationDbContext dbContext)
		: base(userManager, contextAccessor, claimsFactory, optionsAccessor, logger)
	{
		if (userManager == null)
			throw new ArgumentNullException(nameof(userManager));

		if (dbContext == null)
			throw new ArgumentNullException(nameof(dbContext));

		if (contextAccessor == null)
			throw new ArgumentNullException(nameof(contextAccessor));

		_userManager = userManager;
		_contextAccessor = contextAccessor;
		_db = dbContext;
	}

	public override async Task<SignInResult> PasswordSignInAsync(TUser user, string password, bool isPersistent, bool lockoutOnFailure)
	{
		var result = await base.PasswordSignInAsync(user, password, isPersistent, lockoutOnFailure);

		var appUser = user as IdentityUser;

		if (appUser != null) // We can only log an audit record if we can access the user object and it's ID
		{
			var ip = _contextAccessor.HttpContext.Connection.RemoteIpAddress.ToString();

			UserAudit auditRecord = null;

			switch (result.ToString())
			{
				case "Succeeded":
					auditRecord = UserAudit.CreateAuditEvent(appUser.Id, UserAuditEventType.Login, ip);
					break;

				case "Failed":
					auditRecord = UserAudit.CreateAuditEvent(appUser.Id, UserAuditEventType.FailedLogin, ip);
					break;
			}

			if (auditRecord != null)
			{
				_db.UserAuditEvents.Add(auditRecord);
				await _db.SaveChangesAsync();
			}
		}

		return result;
	}

	public override async Task SignOutAsync()
	{
		await base.SignOutAsync();

		var user = await _userManager.FindByIdAsync(_contextAccessor.HttpContext.User.GetUserId()) as IdentityUser;

		if (user != null)
		{
			var ip = _contextAccessor.HttpContext.Connection.RemoteIpAddress.ToString();

			var auditRecord = UserAudit.CreateAuditEvent(user.Id, UserAuditEventType.LogOut, ip);
			_db.UserAuditEvents.Add(auditRecord);
			await _db.SaveChangesAsync();
		}
	}
}

Let’s step through the changes.

Firstly I specify in the constructor that I will require an instance of the ApplicationDbContext, since we’ll directly need to work with the database to add audit records. Again, constructor injection makes this nice and simple as I can rely on the DI container to supply the appropriate object at runtime.

I’ve also added some private fields to store some of the objects the class receives when it is constructed. I need to access the UserManager, DbContext and IHttpContextAccessor objects in my overrides.

The default SignInManager defines it’s public methods as virtual, which means that since I’ve inherited from it, I can now supply overrides for those methods. I do exactly that to implement my auditing logic. The first method I override is the PasswordSignInAsync method, keeping the signature the same as the original base method. I await and store the result of the base implementation which will actually perform the sign in logic. The base method returns a SignInResult object with the result of the sign in attempt. Now that I have this result I can use that to perform some audit logging.

I cast the user object to an IdentityUser so that I can access it’s ID property. Assuming this cast succeeds I can go ahead and log an audit event. I get the remote IP from the context, then I inspect the result and call it’s ToString method(). I use a switch statement to generate an appropriate call to the CreateAuditEvent method passing in the correct UserAuditEventType. If a UserAudit object has been created I then write it into the database via the DbContext that was injected into this class when it was constructed.

I have a very similar override for the SignOutAsync method as well. In this case though I have to get the user via the HttpContext and use the UserManager to get the IdentityUser based on their user id. I can then write a logout audit record into the database. Running my application at this stage and performing some logins, login attempts with an incorrect password and logging out I can check my database and see some records being stored in the database.

db

Summing Up

Whilst not yet fully featured, this blog post hopefully demonstrates the initial steps that we can follow to quite easily extend and override the ASP.NET Core Identity SignInManager class with our own implementation. I expect to be refactoring and extending this code further as my requirements determine.

For example, while the correct place to call the auditing logic is from the SignInManager, I will likely create an AuditManager class which should have the responsibility to actually create and write the audit records. If I do this then I will still need my overridden SignInManager class which would require an injected instance of the AuditManager. As my audit needs grow, so will my AuditManager class and some code will likely get reused within that class.

Including an extra class at this stage would have made this post a bit more complex and have taken me away from my initial goal of showing how we can extend the functionality of the SignInManager class. I hope that this post and the code samples prove useful to others looking to do similar extensions to the default behaviour.

The post Extending the ASP.NET Core 1.0 Identity SignInManager appeared first on Steve Gordon.

CQRS with Mediatr and ASP.NET Core

$
0
0

I was first introduced to the Mediatr library when I started contributing to the allReady project. It is now being used quite extensively within that application. It has proven to be very useful in decoupling code and separating the concerns. Contributors to the project have recently worked through a good chunk of the codebase and moved many database commands and queries over to the Mediatr request/response pattern. This is allowing us to move away from a large data access wrapper to multiple handlers that clearly handle one function and which are much easier to maintain. This has led to smaller, more testable classes and made the code easier to read as a result.

CQRS Overview

Before going into Mediatr specifically I feel it’s worth briefly talking about Command Query Responsibility Segregation or CQRS for short. CQRS is a pattern that seeks to separate the code and models which perform query logic from the code and models which perform commands such as an insert or update. In each case the model to define the input and output usually differs. By separating the commands and queries it allows the input/output models to be more focused on the specific task they are performing. This makes testing the models simpler since they are less generalised and are therefore not bloated with additional code. Rather than returning an entire database model, a query response model will usually contain only a subset of a table’s fields and possibly data from many related objects, all needed to form a particular view. The input model for a query may be very small. Commands on the other hand will usually require larger input models which more closely map to a full database table and have slimmer response models. Commands may perform some business logic on the properties in order to validate the object before saving it into a database. By contrast the models used for a query will generally contain less business logic.

As with any pattern, there are pros and cons to consider. Some may feel that the complexity added by having to manage different models may outweigh the benefits of separating them. Also, as with all patterns, the concept can be taken too far and start to become a burden on productivity and readability of the code. Therefore the degree to which one uses the CQRS pattern should be governed by each use case. If it’s not providing value, then don’t use it!

Coming back to the allReady project; the approach taken there has been to separate the querying of data used to build the view models from the commands used to update the database. Queries occur far more often than commands, as each page load will need to build up a view model, often with calls to the database to pull in relevant data. By keeping the queries distinct from the commands we can manage the exact shape of the input as well as the size of the data being returned. Queries need to perform quickly since they have a direct effect on user experience and page loads times. Keeping the models as slim as possible and only querying for the required database columns can help the overall performance.

Back to Mediatr

The Mediatr library provides us with a messaging solution and is a nice fit to help us introduce some concepts from the CQRS pattern into our code. In allReady it has allowed the team to greatly simplify the controllers and in many cases they now have a single dependency on Mediatr which is injected by the built in ASP.NET Core dependency injection. The MVC actions use Mediatr to send messages for the data they need to populate the view (queries) or to perform actions that update the database (commands).

Mediatr has the concept of handlers which are responsible for dealing with a query or command message. A handler is setup to handle a particular message which will contain the input needed for the command or query. A query message will usually need only a few properties, perhaps just an id of the object to query for. A command message may contain a more complete object with all of the model’s properties that need to be updated by the handler.

Using Mediatr with ASP.NET Core

Using Mediatr in an ASP.NET Core project is pretty straightforward. There are a couple of steps required in order to set things up.

Firstly we need to bring in the Mediatr package from Nuget. The quickest way is to use the package manager console by issuing the command “Install-Package MediatR”. At the time of writing the current version is 2.0.2.

Now that we have Mediatr added to our project we need to register it’s classes with the ASP.NET Core Dependency Injection (DI) container. The exact way you do this will depend on which DI container you are using. I’m going to show how I’ve got it working in ASP.NET Core with the default container. I ended up pretty much following a great Gist that I found. It got me started with registering Mediatr and it’s delegate factories so all credit to the author.

Within the Startup.cs class ConfigureServices method I added the following code to register Mediatr.

services.AddScoped<IMediator, Mediator>();
services.AddTransient<SingleInstanceFactory>(sp => t => sp.GetService(t));
services.AddTransient<MultiInstanceFactory>(sp => t => sp.GetServices(t));
services.AddMediatorHandlers(typeof(Startup).GetTypeInfo().Assembly);

First I add the Mediatr component itself. There are also two delegate types for the Mediatr factories which must be registered. The final line calls an extension method which will look through the assembly and ensure that any class which is a type of IRequestHandler or IAsyncRequestHandler is registered. By reflecting through the assembly in this way we avoid having to manually map each handler in DI when we create it.

public static class MediatorExtensions
{
	public static IServiceCollection AddMediatorHandlers(this IServiceCollection services, Assembly assembly)
	{
		var classTypes = assembly.ExportedTypes.Select(t => t.GetTypeInfo()).Where(t => t.IsClass && !t.IsAbstract);

		foreach (var type in classTypes)
		{
			var interfaces = type.ImplementedInterfaces.Select(i => i.GetTypeInfo());

			foreach (var handlerType in interfaces.Where(i => i.IsGenericType && i.GetGenericTypeDefinition() == typeof(IRequestHandler<,>)))
			{
				services.AddTransient(handlerType.AsType(), type.AsType());
			}

			foreach (var handlerType in interfaces.Where(i => i.IsGenericType && i.GetGenericTypeDefinition() == typeof(IAsyncRequestHandler<,>)))
			{
				services.AddTransient(handlerType.AsType(), type.AsType());
			}
		}

		return services;
	}
}

The AddMediatorHandlers method first finds all class types in the assembly. It loops through each class and gets it’s interfaces. If any of the interfaces are an IRequestHandler or IAsyncRequestHandler then we add a transient mapping to the services collection.

If you need further details or samples for registering Mediatr with a different DI container I recommend you check out the wiki on Github which contains some setup guidance and links to samples.

Messages and Handlers

The pattern we’ve employed in allReady is to use the Mediatr handlers to return ViewModels needed by our actions. An action will send a message of the correct type to the Mediatr instance and expect a ViewModel in return. All of the logic to handle the DB queries which fetch the data needed to build up the view model are contained within the handler. We also use Mediatr to issue and handle commands for HTTP post/put/delete request actions. These actions will often need to update a record in the database. We send the created/updated object in the message and a handler picks it up, processes it and returns a success or failure result back to the action.

You can also chain Mediatr handlers by having a handler send out it’s own message which allows you to compose queries to get the data you need. For example if you have a handler which reads a user record from a database, this same user model may be needed as part of multiple view models. Rather than code the same database query each time within each handler, you can place your data access query inside a single handler. This handler can then return the user data to any other handler which sends a message for the user data. This allows us to adhere to the don’t repeat yourself principle by writing the code and logic only once. We can also test that logic to ensure that it works as expected and be confident that as everyone uses it they can expect consistent responses.

To create a request message in Mediatr you create a basic class marked as an implementation of the IRequest or IAsyncRequest interface. I try to use async methods for everything I do in ASP.NET Core so I’ll stick to async examples in this post. You can optionally specify the return type you expect from the handler. An async handler will return that object wrapped in a task which can be awaited.

Your message class will define all of the properties expected to be in the message. Here is an example of a basic message which will send an Id out and which expects the response from the handler to be a UserViewModel.

public class UserQuery : IAsyncRequest<UserViewModel>
{
	public int Id { get; set; }
}

With a request message defined we can now go ahead and create a handler that will respond to any messages of that type. We need to make our class implement the IRequestHandler or in my case IAsyncRequestHandler interface, defining the input and output types.

public class UserQueryHandlerAsync : IAsyncRequestHandler<UserQuery, UserViewModel>
{
    public async Task<UserViewModel> Handle(UserQuery message)
    {
        // Could query a db here and get the columns we need.
        
        viewModel = new UserViewModel();
        viewModel.UserId = 100;
        viewModel.Username = "sgordon";
        viewModel.Forename = "Steve";
        viewModel.Surname = "Gordon";

        return viewModel;
    }
}

This interface defines a single method named Handle which returns a Task of your output type. This expects your request message object as it’s parameter.

In my example I’m simply newing up a UserViewModel object, setting it’s properties and returning it. In the real world this would be where I query the database using Entity Framework and build up my view model from the resulting data.

I personally have been in the habit of keeping my request message and my response handler classes together in the same physical .cs file, but you can split them if you prefer. I’m normally keen on keeping one class to one file, but in this case since the two classes are very interrelated I’ve found it quicker to work when I can see both in the same file.

We now have everything wired up so finally it’s time to send a message from our controller.

public class UsersController : Controller
{
    private readonly IMediator _mediator;

    public UsersController(IMediator mediator)
    {
        if (mediator == null)
            throw new ArgumentNullException(nameof(mediator));

        _mediator = mediator;
    }

    [HttpGet]
    [Route("users/{userId}")]
    public async Task<IActionResult> UserDetails(int userId)
    {
        UserViewModel model = await _mediator.SendAsync(new UserQuery { Id = userId });

        if (model == null)
            return HttpNotFound();

        return View(model);
    }
}

The key things to highlight here are the controller’s constructor accepting an IMediatr object. This will be injected by the ASP.NET Core DI when the application runs. What’s very useful is that we can easily mock an IMediatr and it’s response which makes testing a breeze.

The UserDetails action itself expects a user id when it is called. This id gets bound from the route parameter by MVC.

The key line in the code above is where we send the mediator message. We do this by calling SendAsync on the IMediatr object. We send a UserQuery object with the Id property set. This message will now be managed by Mediatr. It will locate the suitable handler, pass it the request message and return the response to our action.

As you can see, this has made our controller very light. The only code left is a basic check to return an appropriate not found response if the response to our Mediatr request is null. That won’t ever be true in my example, but in a real world app if the database doesn’t find an object with the id provided I return null instead of a UserViewModel. This is exactly how I like a controller to be, it’s single responsibility is to send the client a HTTP response of some kind to the user’s request. It doesn’t and shouldn’t need to know about our database or have any concerns with building up it’s view model directly.

Testing

Being good citizens we should always consider the testing process. Testing when using Mediatr and a CQRS style pattern is very simple. My approach has been to ensure that each handler has appropriate unit tests around the handle method testing the logic within. To do this we can new up a Mediatr handler in our test class and then we can call the Handle method direct and run tests on the returned object to verify the result.

[Fact]
public async Task HandlerReturnsCorrectUserViewModel()
{ 
    var sut = new UserQueryHandlerAsync();
    var result = await sut.Handle(new UserQuery { Id = 100 });

    Assert.NotNull(result);
    Assert.Equal("Steve", result.Forename);
}

This is a bit of a contrived example, especially as my handler example really doesn’t perform any logic. However we can test for whatever is necessary on the returned result. You can check out the allReady code on Github to see some real examples of tests around the handlers used there. In those cases we often use an in memory Entity Framework DbContext object so that we can test the handler’s EF query returns the expected data from a known set of test data.

We can also test the controllers very easily by passing in a mock of the IMediatr.

[Fact]
public void UserDetails_SendsQueryWithTheCorrectUserId()
{
    const int userId = 1;
    var mediator = new Mock<IMediator>();
    var sut = new UserController(mediator.Object);

    sut.UserDetails(userId);

    mediator.Verify(x => x.SendAsync(It.Is<UserQuery>(y => y.EventId == userId)), Times.Once);
}

We create a mock IMediatr using Moq and pass that in when instantiating a controller. Here I’ve called the UserDetail action with an Id and verified that a query has been sent to the mediator containing that Id.

If necessary you can setup your IMediatr mock so that you define the data that is returned in response to a message. This can be useful if you want to validate your action’s behaviour to different responses. You can mock up the response object using code such as…

var user = new UserViewModel
{
    viewModel.UserId = 100,
    viewModel.Username = "sgordon",
    viewModel.Forename = "Steve",
    viewModel.Surname = "Gordon",
};

var mediator = new Mock<IMediator>();
mediator.Setup(x => x.SendAsync(It.IsAny<UserQuery>())).Returns(user);

If your controller performs any logic based on the returned object you can now easily specify the different scenarios to test that. Something I often do is to write a test that verifies that when the Mediatr response is null the action sends a HttpNotFound result. In a simple example that can be done in the following way…

[Fact]
public async Task UserDetailsReturnsHttpNotFoundResultWhenUserIsNull()
{
    var mediator = new Mock<IMediator>();

    var sut = new UserController(mediator);

    var result = await sut.UserDetails(It.IsAny<int>());

    Assert.IsType<HttpNotFoundResult>(result);
}

Summing Up

I’ve really taken to the pattern that Mediatr allows us to easily implement. It’s a personal choice of course but my view is that it keeps my controllers clean and allows me to create handlers that have a single responsibility. It keeps things nicely separated as nothing it too tightly bound together. I can easily change the behaviour of a handler and as long as it still returns the correct object type my controllers never care.

As I’ve shown the testing process is pretty nice and if we ensure each handler is tested as well as the controllers, then we have good coverage of the behaviours we expect from the classes. A big bonus is that it already supports ASP.NET Core and is pretty simple to setup with the built-in DI container.

Mediatr also supports a publisher/subscriber pattern which I’ve yet to need in my code. It’s something worth taking a look at though if you need multiple handlers to respond when an event occurs. It’s something that I plan to look into at some point.

I highly recommend trying out the Mediatr library and reviewing the pattern being used on the allReady project. It takes little time to setup and quickly become a comfortable flow when writing code. It’s made me think about what my models are involved in and helped me keep them focused and more robust.

NOTE: This post was written based on RC1 of ASP.NET Core and may not be current by the time RC2 and RTM are released.

The post CQRS with Mediatr and ASP.NET Core appeared first on Steve Gordon.

Exploring Entity Framework Core 1.0.0 RTM Changes

$
0
0

It’s been a while since my last post but finally I’ve found some time to get this one together, albeit a shorter post this time around.

Outside of my day job, when time permits I like to code for the open source charity project, allReady. This ASP.NET Core web application has been developed during the betas of .NET Core through to RC1. Recently with the help of the very knowledgeable Shawn Wildermuth, the project has been upgraded to run against the final 1.0.0 RTM version of .NET core.

In this post I’m going to talk about one specific change in Entity Framework Core 1.0.0 between RC1 and RTM which caused some breaks in our code.

Before diving into the issue, I need to briefly explain the structure of our code. We have been working to move a lot of our database logic in allReady into Mediatr handlers. This has proven to be a great way to separate the concerns and split up the logic. Our controllers can send messages (commands or queries) via Mediatr to perform actions against the database. The controller have no dependencies on the database layers and therefore are nice and slim. If you want to read more about how we’ve used this pattern, I covered Mediatr in my previous blog post. For this post, we’ll be looking at the code in a particular handler. The code we’re looking at is not handler specific, I point it out just in case the class seems a little confusing as to where it fits into our project. We’ll focus in on a few specific lines of code within the hander.

In a number of places within our code we need to handle the creation or update of an record stored in the database. For example, we have the concept of Itineraries. In allReady an itinerary represents a series of work items (requests) that are grouped together in order to be worked on by volunteers.

In our .NET Core RC1 code base we had the following handler:

public class EditItineraryCommandHandlerAsync : IAsyncRequestHandler<EditItineraryCommand, int>
{
	private readonly AllReadyContext _context;

	public EditItineraryCommandHandlerAsync(AllReadyContext context)
	{
		_context = context;
	}

	public async Task<int> Handle(EditItineraryCommand message)
	{
		try
		{
			var itinerary = await GetItinerary(message) ?? new Itinerary();

			itinerary.Name = message.Itinerary.Name;
			itinerary.Date = message.Itinerary.Date;
			itinerary.EventId = message.Itinerary.EventId;

			_context.Update(itinerary);
			await _context.SaveChangesAsync().ConfigureAwait(false);

			return itinerary.Id;
		}
		catch (Exception)
		{
			// There was an error somewhere
			return 0;
		}
	}

	private async Task<Itinerary> GetItinerary(EditItineraryCommand message)
	{
		return await _context.Itineraries
			.SingleOrDefaultAsync(c => c.Id == message.Itinerary.Id)
			.ConfigureAwait(false);
	}
}

This handler is called from both the create and edit POST actions on our itinerary controller and is intended to handle both scenarios. Within the Handle method we first try to retrieve an existing itinerary based on the Id of the itinerary object being passed in as part of our message. If this does not return an existing itinerary we null coalesce and create a new empty Itinerary object. We then set the properties of our itinerary object based on those coming in via the message (populated by the user in the front end admin page). Then we call Update on the EF context, passing in the Itinerary object and finally call SaveChangesAsync to apply the changes to the database.

This is where things broke for us after beginning to use the RTM version of the EF Core library. During RC1 and prior, the Update method would check the value of the key property on the model and if it was determined it couldn’t be an existing record (i.e. an Id of zero in our case) then the Update method marked the object as Added in the dbContext change tracking, otherwise it would be set as Modified.

Between RC1 and RTM, the Entity Framework team have tightened up on the behaviour of the Update method and made it perform a little more rigidly. It now only performs the action implied by its name. Any object passed in will be marked as modified, even those objects with an Id of zero. It’s up to the caller to call this method correctly.

The resulting exception thrown when calling SaveChangesAsync (after adding a new record) when running against RTM code is…

Database operation expected to affect 1 row(s) but actually affected 0 row(s). Data may have been modified or deleted since entities were loaded. See http://go.microsoft.com/fwlink/?LinkId=527962 for information on understanding and handling optimistic concurrency exceptions.

Essentially this tells us that we sent in an object marked as modified and EF therefore expected to get a count of 1 row being modified against the database. However, since the id on our new object is zero (this is a new record), it won’t match any existing records in the database and as such, no records are actually updated.

That explains the break we experienced. On reflection, the change makes sense as it avoids any assumptions being made by EF about our intentions. We’re calling update, so it marks the object as modified. We’re expected to use the Add method for new objects.

So, with the problem understood, what do we do about it? There were a number of possible options that I considered when putting in a fix for this issue. I won’t go into great detail here since ultimately I was directed to a very sensible and simple option which I’ll share in a few minutes, but at a high level we could have…

  1. Moved from a single shared handler to two separate handlers, one specifically for creating and one specifically for editing an Itinerary. In that case each handler would know whether to call either Add or Update explicitly. Note that Update in this case would not need to be called since the object is already tracked by the context after we get it from the database – more on that later!
  2. Added some logic within our own code to check if the Id is zero and if so, assume we want to Add the object to the context instead of Update.
  3. Utilised a context extension we have in the project which tries to determine whether to call Add or whether to call Update based on the EntityState of the object. This is similar to option 2, but would allow shared use of similar logic.

All three would have worked to some extent, although not without some possible further issues we’d have needed to address. However after opening an issue on the EF core GitHub repository to try to understand the change, Arthur Vickers suggested a much cleaner solution for our case.

Arthur proposed the following replacement code:

var itinerary = await GetItinerary(message) ?? _context.Add(new Itinerary()).Entity;

itinerary.Name = message.Itinerary.Name;
itinerary.Date = message.Itinerary.Date;
itinerary.EventId = message.Itinerary.EventId;

await _context.SaveChangesAsync().ConfigureAwait(false);

It’s a small but elegant change which actually only touches two lines.

First change:

var itinerary = await GetItinerary(message) ?? _context.Add(new Itinerary()).Entity;

What this now does is first try to get an itinerary as we had before. If we have this then the itinerary variable is set and we can change the values of the properties as required. It’s important to realise at this point that since we queried the db for this object, it’s now already being tracked by the context. As such, if we adjust properties on the object, EF will detect these changes and mark them as modified. We therefore would not need to call Update which has a different intended use case.

If we don’t get an existing record back from the query, then we’re working with a new record. In that case, the code above adds a new empty itinerary object to the context. Add returns an EntityEntry and we can use the .Entity property of that to return the actual entity object (an Itinerary). It is assigned to our local variable and we can then set its properties. Since the Add method on the context has already been called it is already being tracked by the context with an EntityState of added.

Second change:

We can remove the _context.Update(itinerary); line entirely. Since we now have a correctly tracked entity in the context after our first line (either modified or added) we don’t need to try and attach it at this stage. We have re-ordered the logic a little which makes things simpler and cleaner. We can just call SaveChangesAsync() which will send SQL commands to add or update as necessary, based on the change tracking information.

In Summary

This issue highlighted for me personally that I still need to think carefully about how EF works under the covers. I’ve tried to read a lot on EF Core and feel I have a better understanding of how it works at a medium-to-high level. In this case, our code took advantage of behaviour in EF RC1 which was in reality hiding a bit of an issue in our code. I don’t think the code was “bad” exactly, just that as we’ve explored, with a bit of thinking about the change tracking behaviour, we could improve our code. At the time of writing the original code using Update for both the add and edit scenario was valid, although perhaps a little naïve. We relied on EF correctly assessing our intention to mark the object with correct state.

When working with EF I think it’s important to have a basic understanding of how the change tracking works and what it does for us. If we query for a record via the context, than that record starts being tracked. We don’t need to expressly call update since the context is already aware of the object and the change tracker can manage any modified properties during SaveChanges.

Next steps

There is certainly more for me to personally learn about EF and its API in general. For example, in this case I learned about the Entity property that EF exposes on an EntityEntry. Beyond the basics EF core exposes many ways to manage the tracking of entities and those do warrant exploration and experimentation to find the right performance vs complexity balance for each scenario.

The above code still has room for improvement as well. One thing that stands out is that we are performing a db query to get an object, in order to update it and save it. This is slightly inefficient in our case. When building the edit page, we’ve already queried for the object to set the form fields in the UI. On our post we’re then querying again, purely to attach the object in it’s current state to the context. A pattern I’ve started using elsewhere for a more performant update is to manually attach an object and mark it’s properties as modified without the need to query it first. In this case, it may be unnecessarily complex in order to remove a pretty light db query, but as always, it’s worth considering.

My thanks go out to Arthur Vickers for his response to my EF issue. It’s extremely helpful being able to reach out to the team directly as we all learn the nuances of the changes in the .NET core libraries.

The post Exploring Entity Framework Core 1.0.0 RTM Changes appeared first on Steve Gordon.


GitHub Contributor Tips and Tricks (Gitiquette)

$
0
0

I made by first GitHub pull request back in November 2015. After a code review I needed to make some changes to the code and the learning curve of Git/GitHub bit me. I had to close my PR and open a fresh one in order to get my code accepted since I couldn’t figure out rebasing. Now a year on, I have had over 100 pull requests accepted on GitHub and have even started helping with code reviews on the allReady project. The journey over the last year started with a steep curve as I got to grips with GitHub and to some extent Git itself.

Back in February in my post about contributing to allReady I briefly covered some rebasing steps useful when contributing on GitHub. In this blog post I wanted to share some further tips and tricks, plus offer my personal views and conventions I follow while attempting to be a good GitHub citizen. I can’t claim to be an expert in GitHub etiquette and I’m still learning as I go but hopefully my experiences can help others new to GitHub to work productively and reduce the pitch of the learning curve a little.

Contributing on GitHub

There is a great post from another allReady contributor and ASP.NET monster Dave Paquette at http://www.davepaquette.com/archive/2016/01/24/Submitting-Your-First-Pull-request.aspx. Dave has covered the main steps and commands needed to work with GitHub and Git in general when contributing to opensource projects. I suggest you read his post for a detailed primer of the commands and GitHub UI.

Git / GitHub Etiquette (Gitiquette)

Rather than repeat advice and steps that Dave has given, in this post I intend to try and share small tips and tricks that I hope allow you to get the best out of opensource and GitHub. These are by no means formal rules and will differ from project to project, so be aware of that when applying them. As an aside; I was quite proud of inventing the term gitiquette before I Googled it and found other people have already used the term!

Raising GitHub Issues

If you find a bug or have an enhancement suggestion for a project, the place to start is to raise an issue. Before doing so it’s good practice to search for any issue (open or closed) that might address a similar point. Managing issues is a large part of running a project on GitHub and it’s good etiquette not to overload the project owners by repeating something that has already been asked and answered. This frees up the owners to respond on new issues.


If you can’t find a similar issue then go ahead and raise one. Try to give it a short descriptive title, summarising the issue or area of the application you are referring to. Try to choose something easy and likely to be searched so that anyone who is checking for related issues can easily find it and avoid repeating a question/bug.


If your issue is more of a question than a bug it can be useful to mark it as such by putting “(question)” or “(discussion)” in the title. Each project may have their own convention around this, so check through some prior issues first and see if there is a preferred pattern in use.


In the content of the issue, try to be as detailed (but also specific) as possible to allow others to understand the bug. Include steps to reproduce the problem if it is a bug. Also try to include screenshots where applicable to share what you’re seeing. If your issue is more of a general question, give enough detail to allow others to understand the reason behind your question. For suggestions, try to back them up with examples of why you believe what you’re suggesting is a good idea to help others make informed arguments for or against.


Keep your language polite and constructive. Remember that a lot of opensource projects are driven by very small teams or individuals around their paid jobs and families. In my opinion, issues are not the right place to complain about things but a place to register problems with a view to getting them solved. “Speak” how you would like to be spoken to.


Once you’ve raised an issue remember that the project leaders may take a while to respond to it, especially if they are a small or one person team. Give them a reasonable period of time to respond and after that time has passed, consider adding a comment as a gentle reminder. Sometimes new issue alerts can be missed so it’s usually reasonable to prompt if the issue goes quiet or has no response.


Each project may have their own process to respond to and to triage issues so try to familiarise yourself with how other issues have been handled to get an idea of what to expect. In some cases issues may be tagged initially and then someone may respond with comments later on.


Once someone responds to your issue, try to answer any follow up questions they have as soon as possible.


If the project owner disagrees with your suggestion or that a bug is actually “by design” then respect their position. If you feel strongly, then politely present your point of view and discuss it openly but once a final decision is made you should respect it. On all of the issues I’ve seen I can’t think of any occasion where things have turned nasty. It’s a great community out there and respect plays a big part in why things function smoothly.


When you start to work on an issue it’s a good idea and helpful to leave a comment on the issue so that others can quickly see that it’s being worked. This avoids the risk of duplicated efforts and wasted time. In some cases the project owners may assign you to the issue as a way of formally tracking assignments.


If you want to work on an issue but are not sure about your potential solution, consider first summarising your thoughts within the issue’s comments and get input from the project owners and other contributors before starting. This can avoid you spending time going down a route not originally intended by the project owners.


If you feel an issue is quite large and might be better broken out into smaller units of work then this can be a reasonable approach. Check with the project how they prefer to handle this but often it’s reasonable to make a sub issue(s) for the work, referencing back to the master original issue so that GitHub provides links between them. Smaller PR’s are often easier to review and merge so it’s often reasonable to break work down like this and quite often preferred.


If someone has said that they are working on an issue but they haven’t updated it or submitted a PR in some time, first check their GitHub fork and see if you can find the work in progress. If it’s being updated and progressing then they are probably still working on the issue. If not, leave a comment and politely check if they are still working on it. It’s not unusual for people to start something with the best intentions and then life comes along and they don’t have time to continue.


If you stop working on an issue part of the way through and may not be able to pick it up for a while, update the issue so others know the status. If you think you will be able to get back to it, then try to give a time frame so that the project owners can determine if someone else might need to pick it up from you. If this is the case you might want to share a link to your fork and branch so others can see what you’ve done so far. Also remember that the project may accept a partial PR as a starting point to resolving the issue. If your code could be committed without breaking the main code base, offer that option.

Git Commits

Next I want to share a few thoughts on best practices to follow when making local commits while working on an issue:

Remember to make a branch from master before starting work on a new issue. Give it a useful name so you can find it again. I personally have ended up using the issue number for most of my branches. It’s a personal choice though, so use what works for you.


It’s not unreasonable to make many work in progress commits locally whilst working on an issue as you progress through it. It can though, be helpful to squash them down before submitting your final PR (see below for a couple of techniques I use to squash my commits).


Your final commit messages that will be included in your PR should be clear and appropriately worded. Try to summarise the commit in the first line and then provide additional detail after a line break and empty line.

GitHub Pull Requests

After you’ve finished working on an issue you’re ready for a pull request. Again I’m sharing my personal thoughts on PRs here and each person and project will differ in style and preference. The main thing is to respect the convention preferred by the project so that they can easily review and accept your work.

It’s a good practice to limit a PR to a single issue. Don’t try to solve too much in one request as it makes reviewing and testing it harder for the project owners. If you spot other bugs along the way then open new issues for them as you go. You can then include the fixes in separate PR(s).


Before submitting your PR I feel it’s good practice to squash or tidy your working commits into logical final commits. This makes reviewing your steps and the content of the PR a bit easier for reviewers. Lots of work in progress or very granular commits can make a PR harder to interpret during code review. Including too many commits will also make the commit history for the project harder to follow once the PR is merged. I aim for 2-3 commits per PR as a general rule (sometimes even a single commit makes sense). Certainly there are exceptions to this rule where it may not make sense to group the commits. See below for advice on how to squash a commit.


I try to separate my work on the actual application code and the unit tests into two separate commits. Personally I feel that it’s then easier for a reviewer to first review the commit with your application code, then to review any tests that you wrote. Instead of viewing the whole set of files changed and wading through it, a reviewer can view each commit independently.


Ensure the commits you do include in your PR are clearly described. This makes understanding what each commit is doing easier during review and once they are merged into the project.


If your PR is a work in progress, mention this on the comment and in the title so that the team know it’s not ready for final merge. Submitting a partial PR can be good if you want to check what you’ve started is in the right direction and to get technical guidance. For example you might use “Fixing Bug in Controller – WIP” as your title. Each project may have a style they would like you to apply so check past PRs and see if any pattern already exists. Once you’re ready for it to be formally reviewed and merged you can update the title and leave a new comment for the project owners.


When submitting a PR, try to describe clearly what you’ve added or changed so that before even reviewing the code the reviewer has an idea of what you’re addressing and how. The PR description should contain enough detail for a reviewer to understand what areas to test and if your work includes UI elements, consider including screenshot(s) to illustrate the changes.


Include a line in your comment stating Fixes #101 (where 101 is the issue number). This will link the PR to the issue to ensure the issue is closed when the PR is accepted. If your PR is a partial fix and should not close the issue, use something like Relates to #101 instead so that the master issue is not automatically closed.


Depending on the PR and project it may be good practice or even required to include unit tests to prove your changes are working.


Before submitting your PR it’s a good idea to ensure your code is rebased from a current version of the master branch. This ensures that your code will merge easily and allows you to test it against the latest master codebase. In my earlier post I included steps explaining how to rebase. This is only necessary if the master branch has had commits added since you branched from it.


Once you receive feedback on your PR don’t take any suggestions or critique personally. It can be hard receiving negative feedback, especially in an open forum such as GitHub but remember that the reviewer is trying to protect the quality and standards of their project. By all means share your point of view if you have reason to disagree with comments, but do so with the above in mind. In my experience feedback has always been valuable and valid.


Once you have received feedback, try to apply any changes in a timely fashion while the review is fresh. You can simply make relevant changes in your local branch, make a new commit and push it to your origin. The PR will update to include the pushed changes. It’s better not to rebase and merge the commit with the original commits so that a reviewer can quickly see the changes. They may ask you to rebase/squash it down after review and before final acceptance to keep the project history clean.

Reviewing GitHub Pull Requests

I’ve started helping to review some of the allReady pull requests in recent months. Here are a few things I try to keep in mind:

Try to include specific feedback using GitHub’s line comment feature. You can click the small plus sign new the line of code you are commenting on so the review is easy to follow. The recent review changes that GitHub have added make reviewing code even more clear.


Leave a general summary explaining any main points you have or questions about the code.


Think of the contributors feelings and remember to keep the comments constructive. Give explanations for why you are proposing any changes and be ready to accept that your opinion may not always be the most valid.


Try to review pull requests as soon as possible while the code is still fresh in the contributor’s mind. It’s harder to come back to an old PR and remember what you did and why. It’s also nice to give feedback promptly when someone has taken the time to contribute.


Remember to thank people for their contributions. People are generously giving their time to contribute code and this shouldn’t be forgotten.

Git Command Reference

That’s the end of my long list of advice. I hope some of it was valuable and useful. Before I close I wanted to share some steps to handle a couple of the specific Git related tasks that I mention in some of the point above.

How to Squash Commits

I wrote earlier about squashing your commits – reducing a large number of small commits into a single or set of combined commits. There are two main techniques I use when doing this which I’ll now cover. I normally do some of these operations in a visual tool such as SourceTree but for the sake of this post I’ll cover the actual Git commands.

Squashing to a single commit

In cases where you have two or more commits in your branch that you want to squash into a single final commit I find the quickest and safest approach is to do a soft reset back to the commit you branched from on master.

Here’s an example set of three commits on a new branch where I’m fixing an issue…

C:\Projects\HTBox-AllReady>git log --pretty=format:"%h - %an, %ar : %s" -3

be7fdfe - stevejgordon, 2 minutes ago : Final cleanup
2e36425 - stevejgordon, 2 minutes ago : Ooops, fixing typo!
85148d7 - stevejgordon, 2 minutes ago : Adding a new feature

All three commits combined result in a fix, but two of these are really just fixing up and tidying my work. As I’m working locally I want to squash these into a single commit before I submit a PR.

First I perform a soft reset using…

C:\Projects\HTBox-AllReady>git reset --soft HEAD~3

This removes the last three commits, the number after the ~ symbol controlling how many commits to reset. The –soft switch tells git to leave all of the changed files intact (we don’t want to lose the work we did!) It also leave the files marked as changes to be committed. I can then perform a new commit which incorporates all of the changes.

C:\Projects\Other\HTBox-AllReady>git commit -a -m "Adding a new feature"
[#123 2159822] Adding a new feature
1 file changed, 1 insertion(+), 1 deletion(-)

C:\Projects\Other\HTBox-AllReady>git status
On branch #123
nothing to commit, working directory clean

C:\Projects\Other\HTBox-AllReady>git log --pretty=format:"%h - %an, %ar : %s" -1

2159822 - stevejgordon, 20 seconds ago : Adding a new feature

We now have a single commit which includes all of our work. Viewing it visually in source tree we can see this single commit more clearly.

Example of branch after a Git squash

We can now push this and create a clean PR.

Interactive Rebasing

In cases where you have commits you want to combine but you want also to control which commits are squashed together we have to do something a bit more advanced. In this case we can use interactive rebasing as a very powerful tool to rewrite our commit history. Here’s an example of 4 commits in a new branch making up a fix for an issue. In this case I’d like to end up with two final commits, one for the main code and one for the unit tests.

C:\Projects\Other\HTBox-AllReady>git log --pretty=format:"%h - %an, %ar : %s" -4

fb33aaf - stevejgordon, 6 seconds ago : Adding a missed unit test
8704b06 - stevejgordon, 14 seconds ago : Adding unit tests
01f0876 - stevejgordon, 42 seconds ago : Oops, fixing a typo
2159822 - stevejgordon, 7 minutes ago : Adding a new feature

Use the following command to start an interactive rebase

git rebase -i HEAD~4

In this case I’m using ~4 to say that I want to include the last 4 commits in my rebasing. The result of this command opens the following in an editor (whatever you have git configured to use)

pick 2159822 Adding a new feature
pick 01f0876 Oops, fixing a typo
pick 8704b06 Adding unit tests
pick fb33aaf Adding a missed unit test

# Rebase 6af351a..fb33aaf onto 6af351a (4 command(s))
#
# Commands:
# p, pick = use commit
# r, reword = use commit, but edit the commit message
# e, edit = use commit, but stop for amending
# s, squash = use commit, but meld into previous commit
# f, fixup = like "squash", but discard this commit's log message
# x, exec = run command (the rest of the line) using shell
# d, drop = remove commit
#
# These lines can be re-ordered; they are executed from top to bottom.
#
# If you remove a line here THAT COMMIT WILL BE LOST.
#
# However, if you remove everything, the rebase will be aborted.
#
# Note that empty commits are commented out

In our case we want to squash the 2nd commit into the first and the 4th into the 3rd so we update the commit lines at the of the file to…

pick 2159822 Adding a new feature
squash 01f0876 Oops, fixing a typo
pick 8704b06 Adding unit tests
squash fb33aaf Adding a missed unit test

Saving and closing the file results in the next step

# This is a combination of 2 commits.
# The first commit's message is:

Adding a new feature

# This is the 2nd commit message:

Oops, fixing a typo

# Please enter the commit message for your changes. Lines starting
# with '#' will be ignored, and an empty message aborts the commit.
#
# Date: Fri Sep 30 08:10:19 2016 +0100
#
# interactive rebase in progress; onto 6af351a
# Last commands done (2 commands done):
# pick 2159822 Adding a new feature
# squash 01f0876 Oops, fixing a typo
# Next commands to do (2 remaining commands):
# pick 8704b06 Adding unit tests
# squash fb33aaf Adding a missed unit test
# You are currently editing a commit while rebasing branch '#123' on '6af351a'.
#
# Changes to be committed:
# modified: AllReadyApp/Web-App/AllReady/Controllers/AccountController.cs
#

This gives us the chance to reword the final commit message of the combined 1st and 2nd commits. I will use the # to comment out the typo message since I just want this commit to read as “Adding a new feature”. If you wanted to include both messages then you don’t need to make any changes. They will both be included on separate lines in your commit message.

# This is a combination of 2 commits.
# The first commit's message is:

Adding a new feature

# This is the 2nd commit message:

#Oops, fixing a typo

I then can do the same for the other squashed commit

# This is a combination of 2 commits.
# The first commit's message is:

Adding unit tests

# This is the 2nd commit message:

#Adding a missed unit test

Saving and closing this final file I see the following output in my command prompt.

C:\Projects\Other\HTBox-AllReady>git rebase -i HEAD~4
[detached HEAD a2e69d6] Adding a new feature
Date: Fri Sep 30 08:10:19 2016 +0100
1 file changed, 2 insertions(+), 2 deletions(-)
[detached HEAD a9a849c] Adding unit tests
Date: Fri Sep 30 08:16:45 2016 +0100
1 file changed, 2 insertions(+), 2 deletions(-)
Successfully rebased and updated refs/heads/#123.

When we view the visual git history in SourceTree we can now see we have only two final commits. This looks much better and is ready to push up.

Git branch after interactive rebase

When interactive rebasing you can even reorder the commits so you have full control to craft a final set of commits that represent the public commit history you want to include.

How to pull a PR locally for review

When starting to help review PRs I needed to learn how to pull down code from a pull request in roder to run it locally and test the changes. In the end it wasn’t too complicated. The basic structure of the command we can use looks like…

git fetch origin pull/ID/head:BRANCHNAME

Where origin is the name of the remote where the PR has been made. ID is the pull request id and branchname is the name of the new branch that you want to create locally. On allReady for example I’d use something like…

git fetch htbox pull/123/head:PR123

This pulls PR #123 from the htbox remote (this is how I’ve named the remote on my system which points to the main htbox/allready repo) into a local branch called PR123. I can then checkout the branch using git checkout PR123 to test and review the code.

In Summary

Hopefully some of these tips are useful. In a lot of cases I’m sure they are pretty much common sense. A lot of it is also personal preference and may differ from project to project. Hopefully if you’re just starting out as a GitHub contributor you can put some of them to use. GitHub for the most part is a great community and is a great place to learn and develop your skills.

I’d love to be able to acknowledge the numerous fantastic blog posts, and Stack Overflow threads that helped me along my way; unfortunately I didn’t keep notes of the sources as I learned things on my 1 year journey. A big thanks none-the-less to anyone who has contributed guidance on Git and GitHub. Every little bit of shared knowledge is a big help to developers who are learning the ropes. It truly is a journey as your contribute more and more on GitHub it gets easier! Happy GitHub-ing!

The post GitHub Contributor Tips and Tricks (Gitiquette) appeared first on Steve Gordon.
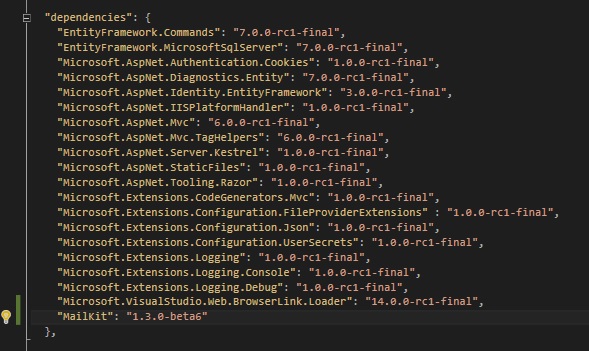
ASP.NET MVC Core: HTML Encoding a JSON Request Body

$
0
0

On a recent REST API project built using ASP.NET Core 1.0 we wanted to add some extra security around the inputs we were accepting. Specifically around JSON data being sent in the body of POST requests. The requirement was to ensure that we HTML encode any of the deserialized properties to prevent an API client sending in HTML and script tags which would then be stored in the database. Whilst we HTML escape all JSON we output as standard, we wanted to limit this extra security vector since we never expect to accept HTML data.

Initially I assumed this would be something simple we can configure but the actual solution proved a little more fiddly than I first expected. A lot of Googling did not yield many examples of similar requirements. The final code, may not be the best way to achieve the goal but seems to work and is the best we could come up with. Feel free to send any improved ideas through!

Defining the Requirement

As I said above; we wanted to ensure that any strings that JSON.NET deserializes from our request body into our model classes do not get bound with any un-encoded HTML or script tags in the values. The requirement was to prevent this by default and enable it globally so that other developers do not have to explicitly remember to set attributes, apply any code on the model or write any validators to encode the data. Any manual steps or rules like that can easily get forgotten so we wanted a locked down by default approach. The expected outcome was that the values from the properties on any deserialized models is sanitised and HTML encoded as soon as we get access to objects in the controllers.

For example the following JSON body should result in the title property being encoded once bound onto our model.

{
	"Title" : "<script>Something Nasty</script>",
	"Description" : "A long description.",
	"Reference": "REF12345"
}

The resulting title once deserialized and bound should be “&lt;script&gt;Something Nasty&lt;/script&gt;”.

Here’s an example of a Controller and input model that might be bound up to such data which I’ll use during this blog post.

public class Thing
{
	public string Title { get; set; }
	public string Description { get; set; }
	public string Reference { get; set; }
}

[HttpPost("CreateThing")]
public IActionResult CreateThing([FromBody] Thing theThing)
{
	// Save the thing to the database here
}

In the case of the default binding and JSON deserialization if we debug and break within the CreateThing method the Title property will have a value of “<script>Something Nasty</script>”. If we save this directly into our database we risk someone later consuming this and potentially rendering it out directly into a browser. While the risk is pretty edge case we wanted to cover it off.

Defining a Custom JSON ContractResolver

The first stage in the solution was to define a custom JSON.net contract resolver. This would allow us to override the CreateProperties method and apply HTML encoding to any string properties.

A simplified example of the final contract resolver looks like this:

using Newtonsoft.Json;
using Newtonsoft.Json.Serialization;
using System;
using System.Collections.Generic;
using System.Linq;
using System.Reflection;
using System.Text.Encodings.Web;

namespace JsonEncodingExample
{
    public class HtmlEncodeContractResolver : DefaultContractResolver
    {
        protected override IList<JsonProperty> CreateProperties(Type type, MemberSerialization memberSerialization)
        {
            var properties = base.CreateProperties(type, memberSerialization);

            foreach (var property in properties.Where(p => p.PropertyType == typeof(string)))
            {
                var propertyInfo = type.GetProperty(property.UnderlyingName);
                if (propertyInfo != null)
                {
                    property.ValueProvider = new HtmlEncodingValueProvider(propertyInfo);
                }
            }

            return properties;
        }

        protected class HtmlEncodingValueProvider : IValueProvider
        {
            private readonly PropertyInfo _targetProperty;

            public HtmlEncodingValueProvider(PropertyInfo targetProperty)
            {
                this._targetProperty = targetProperty;
            }

            public void SetValue(object target, object value)
            {
                var s = value as string;
                if (s != null)
                {
                    var encodedString = HtmlEncoder.Default.Encode(s);
                    _targetProperty.SetValue(target, encodedString);
                }
                else
                {
                    // Shouldn't get here as we checked for string properties before setting this value provider
                    _targetProperty.SetValue(target, value);
                }
            }

            public object GetValue(object target)
            {
                return _targetProperty.GetValue(target);
            }
        }
    }
}

Stepping through what this does – On the override of CreateProperties first we call CreateProperties on the base DefaultContractResolver which returns a list of the JsonProperties. Without going too deep into the internals of JSON.net this essentially checks all of the serializable members on the object being deserialized/serialized and adds JsonProperies for them to a list.

We then iterate over the properties ourselves, looking for any where the type is a string. We use reflection to get the PropertyInfo for the property and then set a custom IValueProvider for it.

Our HtmlEncodingValueProvider implements IValueProvider and allows us to manipulate the value before it is set or retrieved. In this example we use the default HtmlEncoder to encode the value when it is set.

Wiring Up The Contract Resolver

With the above in place we need to set things up so that when our JSON request body is deserialized it is done using our HtmlEncodeContractResolver instead of the default one. This is where things get a little complicated and while the approach below works, I appreciate there may be a better/easier way to do this.

In our case we specifically wanted to only use the HtmlEncodeContractResolver for deserialization of any JSON from a request body, and not be used for any JSON deserialization that occurs elsewhere in the application. The way I found that we could do this was to replace the JsonInputFormatter which MVC uses to handle incoming JSON with a version using our new HtmlEncodeContractResolver. The way we can do this is on the MvcOptions that is accessible when adding the MVC service in our ConfigureServices method.

Rather than heap all of the code into startup class, we chose to create a small extension method for the MvcOptions class which would wrap the logic we needed. This is how our extension class ended up.

public static class MvcOptionsExtensions
{
    public static void UseHtmlEncodeJsonInputFormatter(this MvcOptions opts, ILogger<MvcOptions> logger, ObjectPoolProvider objectPoolProvider)
    {
        opts.InputFormatters.RemoveType<JsonInputFormatter>();

        var serializerSettings = new JsonSerializerSettings
        {
            ContractResolver = new HtmlEncodeContractResolver()
        };

        var jsonInputFormatter = new JsonInputFormatter(logger, serializerSettings, ArrayPool<char>.Shared, objectPoolProvider);

        opts.InputFormatters.Add(jsonInputFormatter);
    }
}

First we remove the input formatter of type JsonInputFormatter from the available InputFormatters. We then create a new JSON.net serializer settings, with the ContractResolver set to use our HtmlEncodeContractResolver. We can then create a new JsonInputFormatter which requires two parameters in its constructor, an ILogger and an ObjectPoolProvider. Both will be passed in when we use this extension method.

Finally with the new JsonInputFormatter created we can add it to the InputFormatters on the MvcOptions. MVC will then use this when it gets some JSON data on the body and we’ll see that our properties are nicely encoded.

To wire this up in the application we need to use our options from the configure service method as follows…

public void ConfigureServices(IServiceCollection services)
{
    var sp = services.BuildServiceProvider();
    var logger = sp.GetService<ILoggerFactory>();
    var objectPoolProvider = sp.GetService<ObjectPoolProvider>();

    services
        .AddMvc(options =>
            {
                options.UseHtmlEncodeJsonInputFormatter(logger.CreateLogger<MvcOptions>(), objectPoolProvider);
            });
}

As we now have an extension it’s quite easy to call this from the AddMvc options. It does however require those two dependencies. As we are in the ConfigureServices method our DI is not fully wired up. The best approach I could find was to create an intermediate ServiceProvider which will allow us to resolve the types currently registered. With access the ServiceProvider I can ask it for a suitable ILoggerFactory and ObjectPoolProvider.

I use the LoggerFactory to create a new ILogger and pass the ObjectPoolProvider in directly.

If we run our application and send in our demo JSON object I defined earlier the title on the resulting Thing class will be “&lt;script&gt;Something Nasty&lt;/script&gt;”.

Summary

Getting to the above code took a little trial and error since I couldn’t find any official documentation suggesting approaches for our requirement on the ASP.NET core docs. I suspect in reality our requirement is fairly rare, but for a small amount of work it does seem reasonable to sanitise JSON input to encode HTML when you never expect to receive it. By escaping everything on the way out the chances of our API returning un-encoded, un-escaped data were very low indeed. But we don’t know what another consumer of the data may do in the future. By storing the data HTML encoded in the database we have hopefully avoided that risk.

If there is a better way to modify the JsonInputFormatter and wire it up, I’d love to know. We took the best approach we could find at the time but accept there could be intended methods or flows we could have used instead. Hopefully this was useful and even if your requirement differs, perhaps you will have requirements where overriding an input or output formatter might be a solution.

The post ASP.NET MVC Core: HTML Encoding a JSON Request Body appeared first on Steve Gordon.

Debugging into ASP.NET Core Source

$
0
0

As I spend more time with ASP.NET Core, reading the source code to learn about it, one thing I find myself doing quite often is debugging into the ASP.NET Core source. This makes it much easier to step through sections of the code to work out how they function internally. Now that Microsoft have gone open source with .NET Core and ASP.NET Core, the source is readily available on GitHub. In this short post I’m going to describe the steps that allow you to add ASP.NET Core source code to your projects.

When you work with an ASP.NET Core application project you will be adding references to ASP.NET components such as MVC in your project.json file. This will add those packages as dependencies to your project which get pulled down via Nuget. One cool feature of the current solution format is that we can easily provide a path to the full source code and VS will automatically add the relevant projects into your solution. Once this takes place it’s the code in those projects which will get executed, so you can now debug them as you would any other area of code in your application.

In this post we’ll cover bringing in the main MVC Core source into an ASP.NET Core application.

The first step is to go and get the source code from GitHub. Navigate to https://github.com/aspnet/Mvc and use your preferred method to pull down the source. I have GitHub Desktop installed so I click the “Open in Desktop” link and choose somewhere on my computer to clone the source into.

Clone MVC Core via GitHub Desktop

By default the master branch will be checked out, which will contain the most recent code added by the ASP.NET team. To be able to import the actual projects into our application we need to ensure the version of the code matches the version we are targeting in our project.json. At the time of writing, the most recent release version is 1.0.1 for ASPNetCore.Mvc. The second step therefore is to checkout the appropriate matching version. Fortunately this is quite simple as Microsoft tag the release versions in Git. Once the repository is cloned locally, open a terminal window at the location of the source. If we run the “git tag” command we will get a list of all available tags.

E:\Software Development\Projects\AspNet\Mvc [master ≡]> git tag
1.0.0
1.0.0-rc2
1.0.1
6.0.0-alpha2
6.0.0-alpha3
6.0.0-alpha4
6.0.0-beta1
6.0.0-beta2
6.0.0-beta3
6.0.0-beta4
6.0.0-beta5
6.0.0-beta6
6.0.0-beta7
6.0.0-beta8
6.0.0-rc1
rel/1.0.1
E:\Software Development\Projects\AspNet\Mvc [master ≡]>

We can see the tag we need listed, 1.0.1, so the next step is to checkout that code using “git checkout 1.0.1”. You will get a warning about moving into a detached HEAD state from Git. This is because we are no longer directly on the end of a branch. This isn’t a problem since we are interested in viewing code from this point in the Git commit history specifically.

Now that we have the source cloned locally and have the correct version checked out we can add the reference to the source into our project. Open up your ASP.NET Core application in Visual Studio. You should see a solution directory called Solution Items with a global.json file in it.

Standard MVC Core solution

The global.json defines some solution level tooling configuration. In a default ASP.NET Core application it should look like this:

{
  "projects": [ "src", "test" ],
  "sdk": {
    "version": "1.0.0-preview2-003131"
  }
}

What we will now do is add in the path to the MVC source we cloned down. Update the file by adding in the path to the array of projects. You will need to provide the path to the “src” folder and use double backslashes in your path.

{
  "projects": [ "src", "test", "E:\\Projects\\AspNet\\Mvc\\src" ],
  "sdk": {
    "version": "1.0.0-preview2-003131"
  }
}

Now save the global.json file and Visual Studio will pick up the change and begin a package restore. After a few moments you should see additional projects populate within the solution explorer.

Solution with MVC Core projects

You can now navigate the code in these files and if you want, add breakpoints to debug into the code when your run the your application in debug mode.

Troubleshooting Tips

While the above steps worked for me on one machine I had a couple of issues when following these steps on a fresh device.

Issue 1 – Package restore errors for the MVC solution

Despite MVC 1.0.1 being a released version I was surprised to find that I had trouble with restoring and building the MVC projects due to missing dependencies. When comparing my two computers I found that on one I had an additional source configured which seemed to be solving the problem for me on that device.

The error I was seeing was on various packages but the most common was an dependency on Microsoft.Extensions.PropertyHelper.Sources 1.0.0. The exact error in my case was NU1001 The dependency Microsoft.Extensions.PropertyHelper.Sources >= 1.0.0-* could not be resolved.

To setup your machine with the source you can open the MVC solution and navigate to the NuGet Package Manager > Package Sources options. This can be found under the Tools > Nuget Package Manager > Package Manager Settings menu.

Add a new package source to the MyGet feed which contains the required libraries. In this case https://dotnet.myget.org/F/aspnetcore-master/api/v3/index.json worked for me.

Package Manager with MyGet feed

Issue 2 – Metadata file could not be found

I hadn’t had this issue in the past when bringing ASP.NET Core Identity source into a project but with the MVC code I was unable to build my application once adding in the source for MVC. I was getting the following error for each project included in my solution.

C:\Projects\WebApplication6\src\WebApplication6\error CS0006: Metadata file ‘C:\Projects\AspNetCore\Mvc\src\Microsoft.AspNetCore.Mvc\bin\Debug\netstandard1.6\Microsoft.AspNetCore.Mvc.dll’ could not be found

The reason for the issue is that the MVC projects are configured to build to the artifacts folder which sits next to the solution file. Our project is looking for them under the bin folder for each of the projects. This is a bit of a pain and the simplest solution I could find was to manually modify the output path for each of the projects being included into my solution.

Open up each .xproj file and modify the following line from

<OutputPath Condition="'$(OutputPath)'=='' ">..\..\artifacts\bin\</OutputPath>

to

<OutputPath Condition="'$(OutputPath)'=='' ">.\bin\</OutputPath>

This will ensure that when built the dll’s will be placed in the expected path that our solution is looking for them in.

Depending on what you’re importing this can mean changing quite a few files, 14 in the case of the MVC projects. If anyone knows a cleaner way to solve this problem, please let me know!

The post Debugging into ASP.NET Core Source appeared first on Steve Gordon.

Loading Pin on Bing Maps from ASP.NET Core MVC Data

$
0
0

As I’ve covered a few times previously in my blog I’m really enjoying working on the allReady project which is run by the Humanitarian Toolbox non-profit organisation. One of the great things about this project from a personal perspective is the chance to learn and develop my skills, whilst also contributing to a good cause.

Recently I picked up an issue which was not in my normal comfort zone, where the requirement was to load a Bing map showing a number of pins relating to request data coming from our MVC view model. I’m not very experienced with JavaScript and tend to avoid it whenever possible, but in this case I did need to use it to take data from my ASP.NET Core model to then populate the Bing maps SDK. As part of the requirement we needed to colour code the pins based on the status of the request.

My starting point was to have a look at the SDK documentation available at http://www.bing.com/api/maps/mapcontrol/isdk. After a bit of reading it looked possible to meet the requirement using the v8 SDK.

The first step we to update our Razor view page to include a div where we wanted to display the map. In our case I had decided to include a full width map at the bottom of the page so my containing div was as follows:

<div id="myMap" style="position:relative;width:100%;height:500px;"></div>

The next step was to include some JavaScript on the page to use the data from our view model to build up the pushpin locations to display on the map. Some of the existing map logic we have on the allReady project is stored inside a site.js file. This means we don’t need to include too much inline code on the page itself In my case the final code was as follows:

@section scripts {
    <script type='text/javascript'
            src='http://www.bing.com/api/maps/mapcontrol?callback=GetMap'
            async defer></script>
    <script type='text/javascript'>
        function GetMap() {
            renderRequestsMap("myMap", getLocationsFromModelRequests());
        };

        function getLocationsFromModelRequests() {
            var requestData = [];
            @foreach (var request in Model.Requests){
                @:var reqData = {lat:@request.Latitude, long:@request.Longitude, name:'@request.Name', color:'blue'};

                if (request.Status == RequestStatus.Completed)
                {
                    @:reqData.color = 'green';
                            }

                if (request.Status == RequestStatus.Canceled)
                {
                    @:reqData.color = 'red';
                }

                @:requestData.push(reqData);
                        }
            return requestData;
        }
    </script>
}

This renders two script blocks inside our master _layout page’s scripts section which is rendered at the bottom of the page body. The first script block simply brings in the Bing map code. The second block builds up the data to pass to our renderRequestsMap function in our site.js code (which we’ll look at later).

The main function here is my getLocationsFromModelRequests code which creates an empty array to hold our requestData. I loop over the requests in our MVC view model and first load the latitude and longitude information into a JavaScript reqData object. We set a name which will be displayed under the pin using the name of the request from our Model. We also set the color on this object to blue which will be our default colour for pending requests when we draw our map.

I then update the color property for our two other possible request statuses. Green for completed requests and red for cancelled requests. With the object now complete we push it into the requestData array. This forms the data object we need to pass into our renderRequestsMap function in our site.js.

The relevant portions of the site.js that result in producing a final map are as follows:

var BingMapKey = "ENTER_YOUR_KEY_HERE";

var renderRequestsMap = function(divIdForMap, requestData) {
    if (requestData) {
        var bingMap = createBingMap(divIdForMap);
        addRequestPins(bingMap, requestData);
    }
}

function createBingMap(divIdForMap) {
    return new Microsoft.Maps.Map(
        document.getElementById(divIdForMap), {
        credentials: BingMapKey
    });
}

function addRequestPins(bingMap, requestData) {
    var locations = [];
    $.each(requestData, function (index, data) {
        var location = new Microsoft.Maps.Location(data.lat, data.long);
        locations.push(location);
        var order = index + 1;
        var pin = new Microsoft.Maps.Pushpin(location, { title: data.name, color: data.color, text: order.toString() });
        bingMap.entities.push(pin);
    });
    var rect = Microsoft.Maps.LocationRect.fromLocations(locations);
    bingMap.setView({ bounds: rect, padding: 80 });
}

The renderRequestsMap function takes in the id of the containing div for the map and then our requestData array we built up in our Razor view. First it calls a small helper function which creates a bing map object targeting our supplied div id. We then pass the map object and the request data into addRequestPins.

addRequestPins creates an array to hold the location data which we build up by looping over each item in our request data. We create a Microsoft.Maps.Location object using the latitude and longitude and add that to the array (we’ll use this later). We then create a Microsoft.Maps.Pushpin which takes the location object and then a pushpin options object. In the options we define the title for the pin and the color. We also set the text for the pin to a numeric value which increments for each pin we’re adding. That way each pin has a number which corresponds to its position in our list of requests. With all of the pushPin data populated we can push the pin into the map’s entities array.

Once we’ve added all of the pins the final step is to define the view for the map so that it centers on and displays all of the pins we have added. I’ve achieved that here by defining a rectangle using the Microsoft.Maps.LocationRect.fromLocations helper function. We can then call setView on the map object, passing in that rectangle as the bounds value. We also include a padding value to ensure there is a little extra space around the outlying pins.

With these few sections of JavaScript code when we load our page the map is displayed with pins corresponding to the location of our requests. Here is what the final map looks like within our allReady application.

Resulting Bing Map

The post Loading Pin on Bing Maps from ASP.NET Core MVC Data appeared first on Steve Gordon.

R.I.P project.json – Out with the new, in with the old

$
0
0

Okay; the title of the post is a bit tongue in cheek! Since it was first announced that the new project.json format (developed by the ASP.NET Core team) was going to be retired in favour of the more traditional csproj file, the .NET community have had some very strong opinions. These have been shared on Twitter, in blog posts, on GitHub and via any other channels people could find. I will admit that when I heard about the change, I initially had some of the same views and concerns. Why would Microsoft take away my beloved project.json? However, I decided to wait it out and see what Microsoft actually produced before passing judgement.

A little bit of history

Let me take a step back here and try to explain a little bit of the history as I have understood it. In the early beta timeframe for ASP.NET Core (then called ASP.NET 5) the ASP.NET and .NET teams were working independently of one another. The .NET team were working heavily on the API surface for .NET Core, whilst the ASP.NET team were working on the ASP.NET Core application platform on top of the API the .NET team were making. The tooling to work with ASP.NET Core was in an early preview and at the time we had DNVM and DNU commands. These have since been consolidated and morphed to form the dotnet CLI.

In order to support development of ASP.NET projects, the team decided to take the opportunity to develop a brand new project file format. One which would be simpler and address many of the issues the community had experienced when working with csproj based projects. At the time, nothing existed specifically for .NET Core projects and it was felt that since ASP.NET Core represented a new beginning for the platform, it was as good a time as any to make changes. During the betas and release candidates people started to get their hands on the new project.json and xproj based solutions when building their web applications. The response was indeed very positive. project.json provided autocomplete of dependencies, ease of reading and a much simpler overall structure.

Personally, I was very pleased when project.json was born. I could easily understand it and it became a regular reference point to review my dependencies and manage my projects.

However, it was during the release candidate period that decisions started to get made around a wider .NET project format for the other application types. Customers were starting to share their concerns around project.json and the fact that it was not supported within MSBuild. What would this mean for large monolith projects, how would they even begin to migrate them to .NET Core? And, being fair, these were valid concerns. Starting with greenfield ASP.NET Core projects was fantastic. There was no need to concern ourselves with the past and the new new project.json was easy to get to grips with. But, working with an existing project would not necessarily be a simple conversion without some degree of work. So the announcements started to be made that project.json would be retired in favour of a more backwards compatible MSBuild ready, csproj format. It was too late in the day for this work to be completed before the RTM of ASP.NET Core 1.0 but we were warned that it would be worked on for release alongside Visual Studio 2017.

And that brings us to today, with the announcement of the release candidate for Visual Studio 2017 we can now get our hands on projects using the new (or should I say old) csproj project format. I’ve taken an early peek at the file to see what has changed.

Comparing project.json (VS 2015) with csproj (VS 2017 RC)

Microsoft have assured us while working on the change that they expected to port many of the improvements that the project.json file gave developers over to the improved csproj format.

Comparing project.json and the new csproj

In the screenshot above (hard to see due to the size) I’ve opened a default new Web Application project in VS 2015 (left) and VS 2017 (right). Side-by-side the obvious difference in that project.json is JSON and the csproj is XML. You will notice that the line length of the files is not too different. project.json comes in at 65 lines and csproj comes in at 77 lines. Already that is a significant reduction in lines from a traditional csproj file.

Here are the complete files:

The other thing which stands out to me is the readability. Despite the work Microsoft have done to reduce noise in the csproj file, I still find it much harder to scan than the project.json. The XML tags draw my eye away from the detail that I actually want to consume.

At the time of writing I’m still very new to working inside VS 2017 and indeed on my computer it’s proofing quite buggy. For example, a solution that I created inside VS 2017 and which had been working fine (1 web application and 1 test class library) no longer re-opens after I saved and closed it. Suffice to say, I won’t be using Visual Studio 2017 for production work at this time and may even remove it entirely as it seems to be affecting my experience inside VS 2015 too.

Once nice advantage of the csproj file over the project.json is that we can now include references to full (non-core) .NET projects as well. Previously the integration was not available.

Something I do miss however (unless it’s just not working for me) is proper autocomplete of the packages and versions. With the project.json I could start typing the name of a dependency and Visual Studio would show me potential autocomplete options. I could also choose from the available versions. This seems to be absent in the csproj file. Personally I only saw basic intellisense for some, but not all, of the xml tags.

Migrating from project.json

Migration from project.json can be achieved in one of two ways. These easiest is to open the existing xproj/project.json project inside Visual Studio 2017. The IDE will detect the project format and prompt for a migration. The other option is to run the dotnet migrate command directly in the command line. This should result in the same conversion.

Migration from project.json

In a quick test for me, the VS migration seemed to work quite well, although that was a single default web application project with basic dependencies. In theory it should work just as well for larger projects. Perhaps when we come to migrate the allReady project which I contribute to, we’ll see if there’s more to it.

Having done this with the project.json solution created in VS 2015 (as appeared above) we get the following csproj output.

Inside the project.json we have our main dependencies section and inside that we define the package and version. This is pretty clear and easy to read. Inside the csproj each package reference is added inside an ItemGroup element. It’s more verbose than the project.json.

Much of the content is similar and when you compare the files you can generally find where each part has been migrated. However you’ll need to remember the more complex XML schema in order to edit the file manually. Indeed, Microsoft seem to be pushing us away from this in favour of IDE tooling and the command line. I fear though, that those are never going to be as quick to work with as we’ve been used to with a quick edit of the project.json file.

Differences between the original csproj and the new csproj

There are some other notable changes between what we see in a traditional csproj file when compared to the newer csproj file. Firstly they have gotten rid of the use of GUIDS within the file, so that it is much more human readable. That’s a good change and one I’m happy to see.

We are no longer required to include all of the files within the csproj file in order for them to be considered part of the project. project.json gave us a much more favourable, include by default, behaviour and this has now been made available inside csproj. It’s ever so slightly different as we must use a wildcard style include line to tell the project to behave this way. New projects created inside VS 2017 have this by default. When working with teams of developers, the csproj file was a common area of merge conflicts. We should no longer have so many issues since the project file will not change simply because we’ve added new files to the project.

Package references are now integrated into csproj so this single file also includes any libraries our project is dependent on and any projects we reference. It’s nice to have everything in one place as we’ve become used to with the project.json format.

Another important change is that we can now edit the csproj file whilst the project is loaded. This was not previously possible and meant that any manual changes were slow to make as we had to first unload the project. Granted, it was rare that I wanted to manually edit the file in the full .NET framework days. To edit the csproj file we can simply right click on the project without unloading it first.

Edit csproj inside VS 2017

One gripe at this point that I experienced is a warning for inconsistent line endings every time I edit the csproj file.

Inconsistent line endings

Other project differences in VS 2017

As well as the direct differences inside the file, there’s a few initial tooling differences I wanted to highlight between VS 2015 and VS 2017 that I’ve noticed.

The main one I’ve seen so far is the consolidated dependencies folder. Before, we had a “References” folder which included any dependent libraries we added via Nuget and any project references. We then had a “Dependencies” folder which included Bower dependencies. Inside Visual Studio 2017 these have been placed together inside a single “Dependencies” container. Project references have their own sub-container to separate them from the Nuget dependencies.

dependenciesfoldervs2017_1

dependenciesfoldervs2017_2

Initial Impressions

I definitely don’t find the XML as readable as the JSON for reviewing the configuration of my project. This will improve with time as I get used to it, but there’s still too much noise in the file for my liking. It’s certainly a big improvement on the traditional csproj format though and the wildcard include of files is an important enhancement.

Personally, I still much prefer the project.json format and whilst I understand the business case the led Microsoft to their change of course, I feel it’s a shame the MSBuild system couldn’t have moved with the times, rather than dropping back to the xml based project file.

The lack of autocomplete for dependencies bothers me too. This was really handy and I could quickly build up my dependencies without having to open up the Nuget package manager each time. It feels like we’re now being forced down that route which proves to be a bit slower and less efficient.

It’s still very early days and I need to spend more time with the new version of csproj in a final stable version of VS 2017 before passing a final judgement. We also have to remember that the .NET SDK tooling is not quite fully baked yet either. At this early point I’m running into quite a few issues running VS 2017 so it’s hard to fully appreciate the final experience.

The Microsoft statements suggest that in reality the tooling and command line interface should negate the need to spend much, if any, time editing the csproj manually. Once everything is complete we will be in a better place to judge for ourselves. I can’t help but assume things will end up being slower overall and that I’ll end up missing the ease of the project.json file.

The post R.I.P project.json – Out with the new, in with the old appeared first on Steve Gordon.

Custom ModelBinding in ASP.NET MVC Core

$
0
0

In a previous post I showed how we could automatically HTML encode data when deserialising it from a JSON request body. In my case this was to meet some specific security requirements we had for an ASP.NET Core API we were building. This time around I will discuss a similar requirement which stated that we should also ensure we HTML encode any strings bound from the route, querystring and form data. We’ll do this by creating a custom ModelBinder.

Much like our earlier requirement, we needed to ensure that we are not storing un-encoded data containing HTML or script tags in our database. While our application escapes the data on the way out, we want to prevent anyone accidentally rendering un-escaped HTML in future applications. We have no requirement to accept HTML code on our API so we decided to ensure each value was encoded by default during binding. As before we wanted to enable this globally so that no developer would have to take specific steps to enable this per controller or action.

Model Binding Flow

Before I jump into the solution, I’ll firstly explain at a high level how the model binding flow works in ASP.NET Core MVC. To understand this better I ended up following steps from this blog post where I discuss how we can add the MVC source solution to our code, allowing us to debug into it. With this in place I was able to step through the model binding code to watch and understand what was happening.

Model binding in principle is quite straight forward. It attempts to match up values coming in on the request to any properties expected by the parameters of the controller and action. Each value is run through the model binding flow which looks to find a suitable binder to handle the value. To find a suitable binder, ASP.NET MVC Core uses binder providers. These providers are registered when MVC is initialised and by default includes 14 different providers. Each of these implements the IModelBinderProvider interface.

There is a provider to handle key value pairs for example, another for complex types and another for simple types. These binders are registered in a specific order and MVC checks each provider in that order during the binding process until it find the first provider which can provide a suitable binder for the object being bound. Each binding provider will have some conditions that check the binding provider context. Once these conditions are met, the provider will return a binder that can handle the binding.

Once we have a model binder available it’s BindModelAsync method is called. This method expects to handle the value of the object being bound and returns a ModelBindingResult. If the binding succeeds as expected then a Success is returned, including the final value to be bound to a property. I hope to spend more time exploring the binding process in a future post. It’s a little beyond the scope here to explain the deeper details of how everything is hooked up. For now, let’s look at how we meet the requirement above to url encode values during the binding process.

Let’s assume we have the following action.

We want to ensure that the newTitle property is HTML encoded by the time we can access it within the action.

Creating a ModelBinder

The starting point for our solution was to create a model binder based on the IModelBinder interface.

We initialize the binder passing in an IModelBinder as a fallback. In my case I am specifically expect to handle string values but I don’t want to worry about the cases for handling null or empty strings. That is already covered in the default SimpleTypeModelBinder provided in MVC. Therefore I chose to pass in a binder which I will pass the responsibility onto in those cases.

Within the BindModelAsync method we first call the the ValueProvider.GetValue method on the value provider in the bindingContext. We pass in the model name which returns a valueProviderResult. As long as there is a value in the result we first check if it’s null or empty. If so, this is where we call the fallback binder’s BindModelAsync method. If we do have a suitable value then we proceed to HTMLEncode it before creating a success ModelBindingResult. Finally we return a completed task using the internal helper TaskCache.CompletedTask.

Creating a ModelBinderProvider

Now that we have a model binder defined we need to create a provider which will determine if the modelbinder is suited to the object being bound. Here is the code…

This provider is pretty simple. We must implement the GetBinder method on the IModelBinderProvider interface. We use the MetaData on the ModelBinderProviderContext to determine if it can provide a suitable binder. This meta data includes some helper properties such as the IsComplexType flag to help us determine if we can provide binding for the object. In this case we are looking only for strings. If the object being bound is a string, then we can return our custom HtmlEncodeModelBinder. Otherwise we return null. When we return null the next binding provider will be given the chance to provide a binder. This continues until a suitable binder is found. You’ll notice that we pass in a new SimpleTypeModelBinder which will act as our fallback for any string null or empty cases we encounter during binding.

Now that we have a binder and a provider, the final step is to add this provider to the list of binding providers. Since these are executed in a set order we also need to place our provider in the right place. I’ve achieved this using the following extension to the MVC options.

What we are doing here is using LINQ to find the SimpleTypeModelBinderProvider in the list of ModelBinderProviders. Our binder provider need to run just before the simple type binder to ensure that we can have the opportunity to handle the string types with our HTML encoding logic. If we placed it after the SimpleTypeModelBinderProvider we would find that the binding flow never reached our code as the binding would already have been handled. We then get the index of the SimpleTypeModelBinderProvider and using that index we insert our binder provider into the list at that position. Now, when MVC binding occurs, our binder provider will be part of the binding process. If we inspect the ModelBinderProviders during debug it should now look like this:

ASP.NET Core ModelBinders List

You can see our new custom HtmlEncodeModelBinderProvider listed before the SimpleTypeModelBinderProvider.

Finally, with everything complete we can do the final wiring up. We call our options extension when adding MVC within the ConfigureServices method in Startup.cs

Now when the newTitle parameter is bound on our example action it will ensure that any html tags are safely encoded. As with all of my posts, I’ve taken the best approach I could think of to implement this. I welcome any comments and suggestions to improve this code or correct any mistakes!

The post Custom ModelBinding in ASP.NET MVC Core appeared first on Steve Gordon.

Running a Humanitarian Toolbox Code-A-Thon

$
0
0

I’ve been involved with the Humanitarian Toolbox allReady project for about one year now. I’ve really enjoyed being able to contribute to the cause, while learning plenty along the way. Contributing has made me a better programmer and exposed me to new libraries and techniques which I am already benefiting from in my day job and in other projects.

During my time as a contributor I’ve be aware of the code-a-thons which have taken place in the US, Canada and more recently Europe. They’ve always seemed like great events and I’m excited to be signed up for the 2-day code-a-thon in London next month. A few months ago I discussed my experience with allReady and my wiliness to attend the London event with the management at my employer, Madgex Ltd. They were very receptive and were keen to support the cause. In fact, they are now funding 4 developers (including myself) to attend the full two days in London. Madgex are covering the transportation costs and hotel accommodation as well as loosing 4 developers for 2 days so this is a generous contribution.

In addition to the NDC event, we had discussions about arranging a code-a-thon at our office in Brighton, one evening after work. I was really keen to get something planned in and allow other developers to be able to contribute and experience allReady. With the concept green lighted by senior management, we set about making the idea a reality.

Planning

The starting point was to arrange a 30 minute presentation about Humanitarian Toolbox and allReady to gauge interest and demonstrate the application. I prepared a set of slides and a short demo which I presented in our board room one lunchtime. We had a good turnout of about 16 people in the room and it planted the seed with a few of the attendees, who talked to me afterwards about getting involved.

With the awareness raised, I followed up with some emails to the Madgex staff to further determine if people would be willing to join an event locally. I got some positive indications from enough people, so we picked a date and the invites went out to the staff. We planned our initial event for one evening after work. We agreed that 3 hours would be most practical given that people had already done a full day of work. Over the next few weeks I continued to promote the idea and started to confirm attendees for the evening. We had 7 or 8 people showing good interest as we closed in on the planned date. This was all supported by our developer lead at Madgex, Steve (great name!)

1 week to go

With a week to go we started to ramp up our planning activities. Steve (developer lead), helped with the physical space we needed and secured budget for some pizzas on the night (always a great lure for developers!).

I started combing through issues on GitHub that would be suitable for new contributors. We have a lot of work on-going with the project, pushing towards our v1 release but many of the issues that are left are quite complex and require a reasonable knowledge of the codebase. The balance was finding interesting and diverse issues, whilst ensuring that they wouldn’t require too much time up-front having to learn about the entire application. I had decided to try the new project feature inside GitHub to plan and organize the event. I created a few statuses and dropped issues into the “Not Started” category. The project feature is a basic Kanban board which allows cards to be dragged between statuses as the work progresses.

I also put together a pre-requisites list for the confirmed and tentative attendees, guiding them to ensure they had the latest tooling for .NET core installed, had forked and cloned the repository and were able to get it building. This is an important activity since it’s a little time consuming and we didn’t want to spend most of the time at the code-a-thon performing the setup work. As the big day approached we started to firm up numbers so we knew what cabling infrastructure we would need.

On the day

On the morning of the event, I did a final round up of the staff to confirm final attendees. After completing this we had about 6 locally able to attend as well as one of our developers from our North American office in Toronto, Canada. I started collecting GitHub usernames so that we could add people as contributors on the repository. This isn’t absolutely required, but aids in assigning issues to specific people. We also arranged to get people added to the Humanitarian Toolbox Slack channel so they could ask questions from our project experts and the Humanitarian Toolbox founders during the event.

At 4:30pm (with 30 mins to go) I moved into the meeting room we would be using for the evening. I wanted to get the webcam setup and ensure we had the cables for power and networking. Our fantastic systems technician Ricky had beaten me to it and already sorted the cabling requirements. We tested out the remote Skype link to Luke in Canada and made sure we had everything ready. A big thanks to Ricky for volunteering his time to provide some tech support and make sure we got up an running so smoothly.

Humanitarian Toolbox Code-A-Thon Sign
You must have a nice sign when running a code-a-thon!

At 5pm our team of developers migrated like birds in the winter, to the meeting room. We had 5 developers joining me locally, plus Luke video conferencing with us from across the pond. We’d decided to relocate our desktop PCs into this common area so that it would be easier to support each other during the event. While this required a little time up-front to disconnect and reconnect the PCs, it proved a good move as I was able to answer questions, share information and demo things very easily for everyone.

Preparing for the event
Developers getting setup for the event

By about 5:20pm we were in good shape, the computers were moved, developers were settled, pizza orders had been taken (priorities people). We started with a brief Google Hangouts standup with the Humanitarian Toolbox team. James and Tony introduced the project, it’s goals and thanked everyone for taking the time at the end of their working day to stay on and code for the greater good. We also had one of the most regular project contributors Mike on the call, showing his support for the event. Being able to speak to the founders and project team made for a great start and really set the tone for a fun evening, supporting code to save lives.

It’s worth pointing out here a couple of things that James and Tony highlighted during the standup. Firstly, the initial use case for the application will be to aid the American Red Cross with the effort to install free smoke alarms in people’s homes. Already this initiative has helped save lives when disaster struck and a family’s home caught fire. Thanks to a smoke alarm installed by the Red Cross, the family were alerted to the fire and all able to evacuate safely. Also important to note is that for each hour of coding time spent on the application we can expect about 40 hours of volunteer time saved. That’s a huge return and really shows that even sparing a few hours of personal time can have a massive impact.

With the project introduced and the devs eager to get going we started the team off by finding issues people were keen to work on. Sarah, Roberto and Luke took on some unit tests, Patrick picked up a new feature requirement, while Chris dove in with some EF and migrations code for the first time. Mark one of our front end developers started looking at the homepage UI improvements. I floated around the room to answer questions, demonstrate the site functionality and to help with the GitHub flow. I really enjoyed watching new contributors getting up to speed with the code and being able to assist their learning as they progressed. It was good to be able to witness some of the common questions new contributors have so we can focus on lowering the barrier to entry in the future.

Developers working hard during the code-a-thon

There were a lot of new things for everyone to learn and they did a fantastic job of absorbing the information and becoming productive quickly. All of the developers were new to GitHub and OpenSource, so there was learning to be done around the processes to ensure an up-to-date master branch, to manage rebasing and prepare pull requests. Most of the team were also experiencing ASP.NET Core for the first time, which in itself has a lot of new concepts to learn. It was also the first exposure to Entity Framework for everyone, so that had it’s own learning curve too. This really highlights another benefit of contributing to the project for developers. It’s a great learning experience that puts a real-world, production-ready code base in the hands of developers.

During the 3 hours everyone knuckled down and other than a brief break to load up our plates with some pizza, we worked solidly. I had hoped to use the GitHub project feature to keep track of things, but we hit some issues with people not being able to move the cards themselves. While I was able to do this, it proved more of a hindrance as my time was better spent helping people around the room. In the end we abandoned that feature and in hindsight a post-it-note board might have been easier to manage. I still like the concept of using GitHub so that others not physically at the event can monitor progress, but we need to find a way to allow contributors to manage the cards as they work on issues. I suspect it might just be a permissions thing, so I’ll investigate it soon.

By the end of the evening we had submitted two pull requests which were reviewed and merged into the project before we left. We also had three other issues very close to being completed which will be finished off in the coming days and hopefully submitted soon. Given the setup time, huge learning curve and relatively short coding period of three hours, I’m very pleased with this achievement. Everyone was amazed when we realised that we had hit the 8pm finish already. Time flew, which is a great sign and from feedback so far, people would have liked to have even longer with the code. Perhaps an all day event ison the cards for the future.

I really hope that everyone left feeling as positive and happy as I did. Certainly the sense I got was that everyone enjoyed learning some new things, getting to grips with the code and contributing to a good cause. I feel proud to be part of such a generous team of people who were able to join this code-a-thon after a full day of development at work first. Everyone should be very proud of what they managed to contribute. I’d love to run another session to continue the great start we’ve made and if people are willing, perhaps we can make it a regular thing or even look at a longer full day event.

From a personal perspective I enjoyed sharing what I’d learned during my time with the project and seeing other developers pick up the concepts for themselves. Prior to this, I’ve never been too keen on the idea of being a “teacher” and even presenting is not in my normal comfort zone, but I found a bit of a passion for instructing people. I’m a firm believer that by sharing information, it helps our own understanding as you are challenged to know enough to be able to articulate the concepts.

Code-a-Thon Team Photo
Code-a-Thon Team Photo (Sarah had escaped just prior to this being taken!)

Feedback

The feedback the day after has been extremely positive. I’m very happy to hear that people enjoyed themselves and had a positive and fun experience. It’s nice to spend time coding for fun, outside of the normal day-to-day work. Being able to put your skills to use towards such a positive concept is also very rewarding. From a quick survey afterwards, the team are keen to continue to contribute to the project and would like to take part in another code-a-thon in the future.

Thanks again to everyone who took part:

Our developers: Sarah, Patrick, Chris, Mark, Roberto and Luke
Tech support: Ricky
Planning and management: Steve K
Humanitarian Toolbox Support: James, Tony and Mike

The post Running a Humanitarian Toolbox Code-A-Thon appeared first on Steve Gordon.


Updating an ASP.NET Core Site to the December 2016 Release

$
0
0

I run into an issue this week during what should have been a simple ASP.NET Core application update. I wanted to share my experience in case others run into similar problems. Also, I’m sure to be back here myself to remember this in the future!

On December 13th Microsoft released their second minor patch release for the LTS (Long Term Support) track of .NET Core. ASP.NET Core releases on two tracks depending on how cutting edge you want to be. LTS is the “safer” track, which will be supported and bug fixed during the support lifespan. The other track is FTS (Fast Track Support) which will be where new features appear. You can read more about this on the Microsoft Blog.

As you may be aware from reading my other posts, I’m contributing to an opensource charity project called allReady. We’re currently using the LTS track packages and at the time of writing still targeting the full .NET framework (as opposed to .NET Core). We had applied the last patch release 1.0.1 packages in September without any major problems so I was hoping for the same experience with this patch release.

The details for the release were made available in this Microsoft blog post. If you follow the links to the release notes you will see that the ASP.NET Core updates are considered version 1.0.3. This is where the versioning starts to get a little murky in my opinion. ASP.NET Core itself has a version number (now 1.0.3) which tracks general “releases” of the framework. However, the individual packages that actually make up .NET Core and ASP.NET Core also have version numbers and revisions. Those numbers don’t track with the main release version, so it starts to get a bit confusing. You won’t for example find a package for Microsoft.AspNetCore.Mvc at version 1.0.3. The latest for that package is 1.0.2.

I’ll now step through how I upgraded our project and then discuss the issue I experienced with the EF commands for entity framework. Before starting to update the project I made sure to install the latest version of the 1.0.3 SDK from the Microsoft website.

Update Package.json

This is where the first pain point came for me. It wasn’t listed specifically in the blogs posts or release notes all of the package which had updated and what the latest package versions were. So my initial solution was to turn to the VS Nuget Package Manager where I was hoping I could simply update all of the Microsoft packages to the latest versions. However, since the package manager lists the latest (non pre-release) versions, it was offering me the FTS 1.1.x versions. So a simple, upgrade all option was out of the question.

Next I went into the project.json manually planning to update each package by hand, allowing autocomplete to give me the latest versions. However autocomplete didn’t always seem to pick up the latest version number for me automatically and I was worried about missing something. So I reverted back to the Nuget Package Manager and went one by one through the Microsoft packages. I used the install dropdown to select the newest LTS version 1.0.x for each one. This was slow and manual but at least meant I knew what options I had and could be explicit in choosing the latest version i wanted.

Here’s a rundown the packages from our project.json that I needed to update and the versions number they are are now on (which should be the latest LTS release). Note that our project.json may well differ for newly generated projects so you may not have all of these packages and you may even have dependencies listed that we do not.

"Microsoft.EntityFrameworkCore.SqlServer": "1.0.2",
"Microsoft.EntityFrameworkCore": "1.0.2",
"Microsoft.ApplicationInsights.AspNetCore": "1.0.2",
"Microsoft.AspNetCore.Mvc": "1.0.2",
"Microsoft.AspNetCore.Mvc.TagHelpers": "1.0.2",
"Microsoft.AspNetCore.Authentication.Cookies": "1.0.1",
"Microsoft.AspNetCore.Authentication.Facebook": "1.0.1",
"Microsoft.AspNetCore.Authentication.Google": "1.0.1",
"Microsoft.AspNetCore.Authentication.MicrosoftAccount": "1.0.1",
"Microsoft.AspNetCore.Authentication.Twitter": "1.0.1",
"Microsoft.AspNetCore.Diagnostics": "1.0.1",
"Microsoft.AspNetCore.Diagnostics.EntityFrameworkCore": "1.0.1",
"Microsoft.AspNetCore.Identity.EntityFrameworkCore": "1.0.1",
"Microsoft.AspNetCore.Server.IISIntegration": "1.0.1",
"Microsoft.AspNetCore.Server.Kestrel": "1.0.2",
"Microsoft.AspNetCore.StaticFiles": "1.0.1",
"Microsoft.AspNetCore.Cors": "1.0.1",
"Microsoft.Extensions.Configuration.Abstractions": "1.0.1",
"Microsoft.Extensions.Configuration.Json": "1.0.1",
"Microsoft.Extensions.Configuration.UserSecrets": "1.0.1",
"Microsoft.Extensions.Logging": "1.0.1",
"Microsoft.Extensions.Logging.Console": "1.0.1",
"Microsoft.Extensions.DependencyInjection.Abstractions": "1.0.1",
"Microsoft.Extensions.Options.ConfigurationExtensions": "1.0.1",
"Microsoft.VisualStudio.Web.BrowserLink.Loader": "14.0.1",
"Microsoft.AspNetCore.Mvc.WebApiCompatShim": "1.0.2",
"Microsoft.Extensions.Logging.Debug": "1.0.1",

I also had to update the dependencies for some of these in our test library, so remember to check there too.

To complete the upgrade I also adjusted the SDK version in our solution’s global.json as follows…

"sdk": {
  "version": "1.0.0-preview2-003156",
  "runtime": "clr",
  "architecture": "x86"
},

With the above changes made I was able to build and run our site via Visual Studio. Great!

It wasn’t until a couple of days later when I hit an issue. During an issue I was working on I’d updated our model classes Entity Framework and needed to build my next entity framework migration. I did this by running the usual command…

dotnet ef migrations add AddNotifications

After building the project I was faced with the following error:

Could not load file or assembly 'Microsoft.EntityFrameworkCore, Version=1.0.1.0, Culture=neutral, PublicKeyToken=adb9793829ddae60' or one of its dependencies. The located assembly's manifest definition does not match the assembly reference. (Exception from HRESULT: 0x80131040)

At this stage I tried a few things, none of which fixed the problem outright, although they may have contributed to the overall solution. Firstly I cleaned my solution and rebuilt, no joy. Then I wondered if Nuget had cached any incorrect versions of the package, so I cleared my local Nuget cache and tried restoring my project dependencies again. Still no joy! Finally I hopped onto the ASP.NET Core Slack channel and sought help there. It was with huge thanks to Chad Tolkien then he suggested a manual deletion of my bin and obj folders within the project. I did that and rebuilt the solution. Success! Finally I was able to generate a migration using the EF CLI tooling. So it seems the clean and restore steps previously hadn’t cleaned everything they needed to.

I’d love to know if there’s a better way to manage these updates currently? I’m hoping that with the final tooling release and VS 2017 things will get easier. It would be useful for example, to be able to choose which track you want to use within Nuget Package Manager. I’m not sure how that would be achieved exactly but it would distinguish the packages you really want to get the latest within your chosen support track. It would also be handy if Microsoft blog posts about each release include specific details of each updated package and it’s latest version number. Having a quick reference when updating dependencies would have made my life a little easier. There are some release notes which hint at the main packages and their new version number, but it didn’t include all components that I ended up changing.

The post Updating an ASP.NET Core Site to the December 2016 Release appeared first on Steve Gordon.

Things I’ve Learnt This Week (29th January)

$
0
0

Whether this will become a regular thing, I’m not sure. But starting this week I’ve been keeping notes on the things I’ve learned, problems I’ve faced and resources that I’ve read, watched or listened to.

I try to consume as much information as possible about ASP.NET and development in a continual drive to learn more and get better at what I do. This includes listening to a regular set of podcasts on my daily commute, reading any blog posts that I can find that relate to things I do or may be doing in the future, and watching videos online. My current focus is around ASP.NET Core so a bulk of the materials I am reading tend to be focused in that area.

I won’t go into explicit details in these posts, as realistically I won’t have time. But I hope to highlight key points of information I have found useful and to share links to things I’ve learned from, hopefully so that others sharing my passion can save some time. It’s also a shameless way to help me remember things as my brain will only hold information for so long!

Things I’ve Learned

Not an exhaustive list (as we’re always learning and that’s one of the things I love about development) but here are a few key things which came to mind after the week has ended. I’ll contain this section to small snippets of information that do not generally warrant a longer, dedicated post.

ASP.NET Core RTM SDK Tooling

I picked up on a point that Damian Edwards mentioned on the weekly ASP.NET community standup this week around the final SDK tooling where I thought I heard him say that for RTM tooling we had to be using VS 2017 when it’s released. I must admit I hadn’t realised this or considered the implications of the move to a refined csproj (from project.json) for ASP.NET Core.

I tweeted Damian to clarify this and he was kind enough to answer my questions. The outcome, as I’ve interpreted it, is that indeed there will be no supported RTM tooling for ASP.NET Core on Visual Studio 2015. The tooling we have now which is preview tooling, will remain available, but unsupported. To get a supported ASP.NET Core tooling experience, developers will need to move to VS 2017 or use VS Code.

The nature of the all new csproj format is that it cannot/will not be implemented in VS 2015. Any projects which are opened on VS 2017 will auto migrate to the newer csproj format and after that, cannot be developed on VS 2015 any longer. It also seems that when ASP.NET Core 2.x lands, that will be csproj and VS 2017 supported only.

I was a bit shocked to learn (and perhaps I was just slow on the uptake) that the above was the case. I had assumed we might get a RTM tools for VS 2015 ASP.NET Core since people have adopted this new platform and will be left with an upgrade if they do want to continue with the full IDE and proper support. Working on an open source ASP.NET Core project as I do, this means we have to think carefully about when / if we bite the bullet and force a VS 2017 / VS Code only experience by upgrading the project.

Setting cache expiry for static files using OWIN

This week I needed to ensure that javascript and css files served via our site had a proper long cache expiry to help optimise page load times. I’ve used middleware in ASP.NET Core a fair bit, but not touched the ASP.NET 4.x OWIN code much. Our project was using the Microsoft.Owin.StaticFiles.StaticFileMiddleware for serving the static files and it turned out that the change to add the Expiry header was very similar to code I’d used in ASP.NET Core for a different, but similar requirement.

In our case all I had to do was ensure that the StaticFileOptions passed into the StaticFileMiddleware included an OnPrepareResponse action to handle setting the expires header like so.

return new StaticFileOptions
{
	OnPrepareResponse = (ctx) =&amp;amp;amp;amp;amp;amp;amp;gt;
	{
		ctx.OwinContext.Response.Expires = DateTimeOffset.UtcNow.AddYears(1);
	}
};

Misc

  • In VS 2017 we will be able to remote debug ASP.NET Core over SSH.

Things I’ve Read

In no particular order here’s some of the blogs and posts I read this week.

Things I’ve Listened To

 Things I’ve Watched

  • Domain-Driven Design: The Good Parts – Jimmy Bogard – I’m keen to understand DDD better and this was a nice talk on some of the concepts. I’m still keen to find some more code based examples but I felt this provided some good foundations.
  • ASP.NET Community Standup – I listen to this weekly to catch up on what’s happening with ASP.NET Core.
  • Public speaking with Scott Hanselman, Kendra Havens, Maria Naggaga Nakanwagi, Kasey Uhlenhuth, and Donovan Brown – This really came at a great time as I start to work on my public speaking. I want to be able to share my passion for ASP.NET Core with others and while I’ve done a few smaller talks at work I want to build up the level, quality and quantity of speaking I do. I will be continuing to build my confidence in smaller groups at work but I would like to get to the point where I can do wider audiences of strangers. I have my next talk on ASP.NET Core nearly finalised for a group of developers at work.

The post Things I’ve Learnt This Week (29th January) appeared first on Steve Gordon.
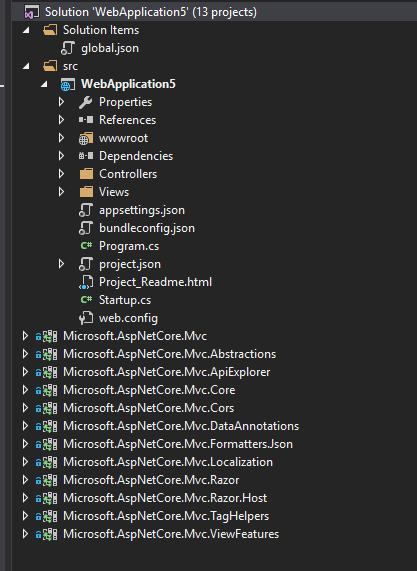
Things I’ve Learnt This Week (5th February)

$
0
0

I’m keeping up my plan (week 2 yay!) to record and share things I’ve learned during the last week. Less from me this week as it’s been fairly hectic and I’ve been feeling a bit unwell.

Things I’ve Learned

Identity Server 4

As part of my work for Humanitarian Toolbox I’ve been actively investigating Identity Server 4 as an option to handle our authentication. The allReady application currently uses ASP.NET Core Identity within the application to support login and user management. As the product nears v1 release discussions have begun around the use cases for the application, including potential for multi-tenancy and considerations around storage of user accounts. As a result this led Richard Campbell to suggest we look into Identity Server 4 to help with this identity flow.

I was lucky enough to have an audience with Brock Allen and Dominick Baier this week to chat through some of the basics about Identity Server. It was really useful to chat with them both and I want to thank them for offering their time and support to the project. One of the key take-aways for me from the call was getting a better understanding of where Identity server fits into the puzzle. It’s about authentication and helping with the protocol of OAuth2 / OpenId communications. It’s not a user management / user store product, although it does sit nicely on top of ASP.NET Core Identity 3 as an option.

As I continue investigating and testing Identity Server 4, I hope to put together some more details posts about how we’re using it and what I learn along the way.

Things I’ve Read

In no particular order here’s some of the blogs and posts that I’ve read this week.

Things I’ve Listened To

Things I’ve Watched

The post Things I’ve Learnt This Week (5th February) appeared first on Steve Gordon.
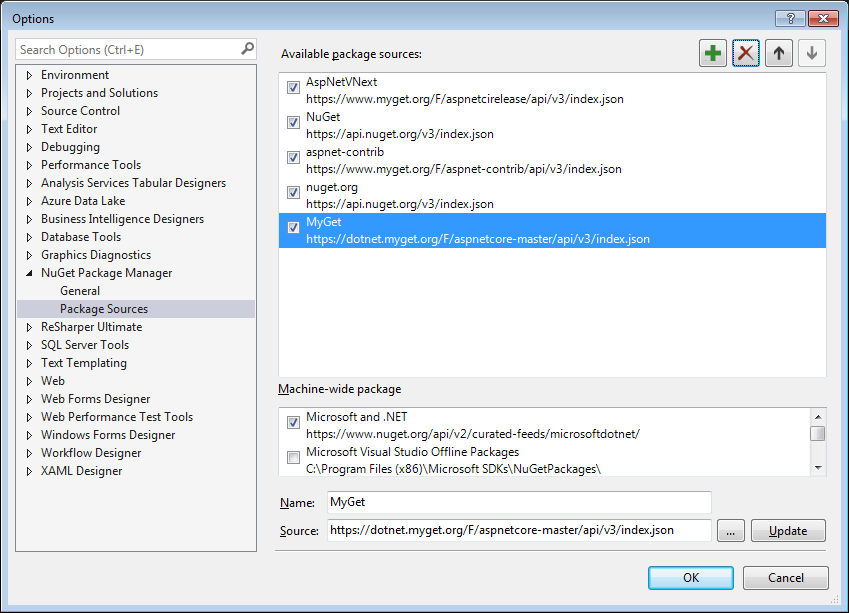
A Reminder to Take Care when Registering Dependencies

$
0
0

I looked into a “fun” little problem yesterday where we were seeing occasional errors in some of our ASP.NET Core code which calls down into the ASP.NET Core Identity UserManager. We were getting a range of NullReferenceException and ObjectDisposedExceptions as well as various exceptions from Npgsql.NpgsqlConnection (we use Postgres rather than SQL in this project) stating things such as “Connection already open”.

The issue was presenting itself within some authentication and authorisation code we have which wraps and extends the ASP.NET Core Identity UserManager and SignInManager functionality. We use ASP.NET Identity over a PostGres database for our user store but include some application specific functionality with our own code. We have our own AuthenticationManager and UserManager classes, both of which take dependencies on the underlying Microsoft.AspNetCore.Identity classes.

These originally got registered in in the ConfigureServices method of the Startup.cs class as follows:

services.AddSingleton<IAuthenticationManager, AuthenticationManager>();
services.AddSingleton<IUserManager, UserManager>();

The constructor for our AuthenticationManager looks a bit like this:

public AuthenticationManager(UserManager<ApplicationUser> userManager, SignInManager<ApplicationUser> signInManager)
{
   // setup our authentication manager here
}

Do you see the problem?

The issue here is the singleton registration. While our classes themselves have no state and could be shared between requests, the dependencies on Microsoft.AspNetCore.Identity.UserManager<T> and Microsoft.AspNetCore.Identity.SignInManager<T> have to be considered.

If we take a look at where these are registered within the Microsoft.AspNetCore.Identity source we can see the following:

services.TryAddScoped<UserManager<TUser>, UserManager<TUser>>();
services.TryAddScoped<SignInManager<TUser>, SignInManager<TUser>>();

They are added using the scoped lifetime which means they expect to be created once per request. They themselves depend on an IUserStore which is registered with the scoped lifetime as well.

As a result, the singleton registration of our AuthenticationManager was trying to hang onto dependencies to objects for the entire application lifetime, where those dependencies only expected to live for the request scope. Sometimes they seemed to get a different database context and hence the “Connection already open” errors we saw. Sometimes the dependencies had been disposed of by the time they got called by our code and as such we saw the various exceptions being thrown. In some cases we seemed to still have access to the UserManager but the context underneath was null. I won’t dive into this tool deeply, but it was apparent that we should really make the registration of our classes scoped as well. This way, they are created once per request, the same as their dependencies. We changed the registration code to the following:

services.AddScoped<IAuthenticationManager, AuthenticationManager>();
services.AddScoped<IUserManager, UserManager>();

This resolved the errors we were seeing immediately. It was an annoying oversight although fortunately it was fairly easy to guess at the cause. The various errors all suggested that we having some issues with the lifetime of the  dependencies. This case has been a reminder to carefully consider the lifetimes of service registrations as it can produce some unexpected errors and behaviour.

The Microsoft documentation even includes a large warning about scoped services – “The main danger to be wary of is resolving a Scoped service from a singleton. It’s likely in such a case that the service will have incorrect state when processing subsequent requests.” – Oh how true this is!

Happy dependency injecting!

The post A Reminder to Take Care when Registering Dependencies appeared first on Steve Gordon.
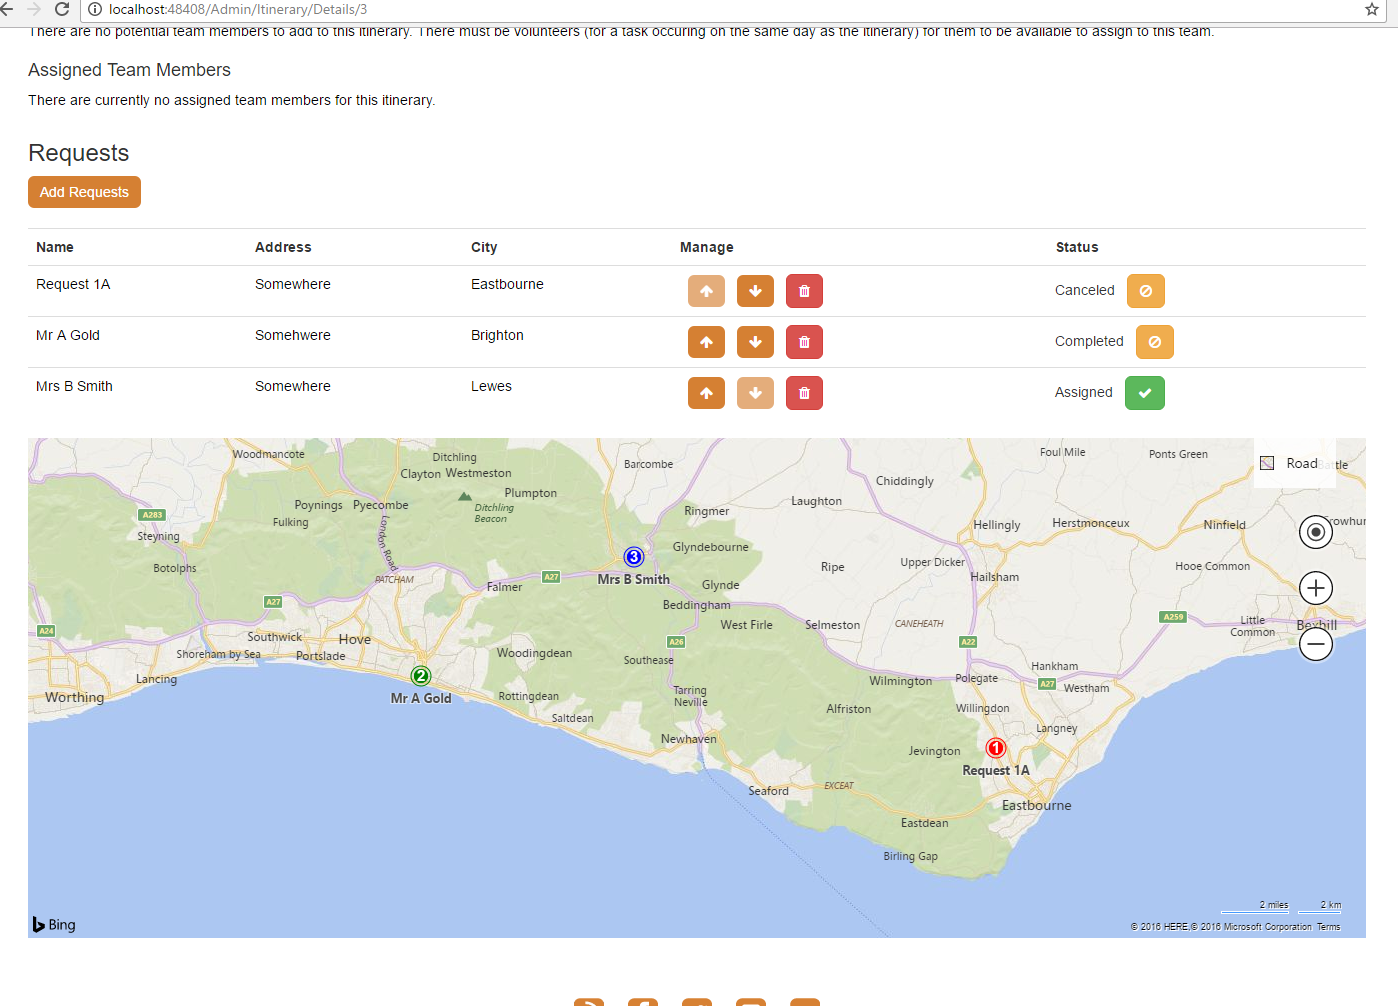
Migrating from .NET Framework to .NET Core

$
0
0

What better way to start the new year than with some coding? In my case I’d found a bit of time during the end of my Christmas vacation to tackle an issue on allReady I’d been wanting to work on for a while. Before getting into the issue, if you want to read more about what allReady is you can read my earlier blog post where I cover contributing to it in greater detail.

allReady was first created during the early beta’s of ASP.NET Core (at which point it was known as ASP.NET 5). At that time, due to some dependencies which did not yet support .NET Core, the application was built on top of the full .NET framework 4.6.

The first thing to discuss briefly is why and how we can run ASP.NET Core on the full traditional .NET framework. While it might be reasonable to assume that ASP.NET Core naturally needs to run on the new .NET Core framework, remember that .NET Core ultimately includes a subset of the larger full .NET framework API. Because of this, it is perfectly possible to run ASP.NET Core on the original 4.x version of the .NET framework. This is an advantage to those that want to make use of the new features and optimizations within ASP.NET Core, while also still utilising the libraries they know and love. This is a perfectly reasonable way to run ASP.NET Core but with an important limitation. By targeting the .NET framework you are not able to develop or host the ASP.NET application outside of Windows.

For the allReady project this had started to become a bit of a limitation. We had Mac users who were keen to contribute to the project, but were unable to do so without installing and running a Windows VM on their device. As we were getting to the end of some complex requirements for allReady’s v1 milestone, I took the opportunity to spend some time looking at retargeting the application to run on .NET Core. This turned out to be a bit more involved that I had first anticipated. However, we have succeeded and the code base has been proven to build and run on both Mac and Linux devices.

Updating the Solution

The first part of the process was to update the project.json file inside the web solution. The main update here was changing the framework specification to netcoreapp from net46.

project.json before:

project.json after:

We had decided as a team to continue to track the .NET Core 1.0.x LTS support stream. In short, this is a stable version of the framework, under full Microsoft support. New minor patch releases are appearing to fix major bugs or security issues, but otherwise the changes are expected to be quite limited. Our project was already targeting the latest 1.0.3 SDK and latest 1.0.x libraries for each of the components.

You’ll see above that as well as changing the framework moniker I’ve added an imports section as well. This was required in our case as we have some dependencies on some libraries which don’t yet specify a dotnet Target Moniker or .NET Standard version. It’s essentially there for backwards compatibility until the ecosystem settles down.

Handling Dependencies

Upon making the required changes to project.json, it became apparent that some of the packages we depend on could no longer be restored. The first thing I did was to use Nuget Package Manager to update all of the dependencies to their latest versions to see if any of those had been updated to support .NET Core. This helped in some of the cases but still left me with a few that were not compatible. For the time being I commented those out as well as commenting out any code using those dependencies. In our case this included the following main libraries we had issues with…

  • XZing which was being used in one place to generate a QR code image for use within the allReady phone application. This had its own dependency on System.Drawing which is not part of .NET Core.
  • LinqToTwitter which was being used in one area of the application to query for a user’s information after a sign in via Twitter.
  • GeoCoding.net which was used in a few places in order to take an address and geo code it to latitude and longitude coordinates.

With those taken care of for now (if only commenting out code was considered “fixing”), the last remaining issue for the web project was a dependency on a separate library project in our solution which contains some shared models. This library is used by both our web application and also in some Azure web jobs we have defined. As a result it needed to support both .NET Core and the .NET Framework. The solution here was to convert it to a .NET standard library. In my case I chose the lowest standard version I could find which gave me the API surface I needed, while supporting my dependent projects. This was the .NET Standard 1.3 version. The project.json for this library was changed as follows.

Before:

After:

With this done, I also had to update our test library project.json in a similar way in order to support .NET Core by changing the frameworks section and updating to the latest versions of our dependencies as with the main web project. The changes in this file were very similar to what I’ve already shown, so I won’t repeat the code here.

Wrapping missing dependencies

With the package restore now succeeding for the web project, test project and our .NET standard project my next goal was to find solutions to the libraries we could no longer use.

XZing was an easy decision as currently the phone application project is a bit stale and it was decided that we could simply remove the QRCode endpoint and this dependency as a result.

When I reviewed the use of LinqToTwitter it was only really abstracting one API call to Twitter behind a more fluent Linq syntax. We were using it to request a Twitter user’s profile information. The option I chose here was to write our own small service to wrap the call to the Twitter REST API which using HttpClient. There are some hoops to jump through in order to establish the authentication with Twitter but this ultimately didn’t prove too difficult. I won’t go into the exact details here since this post is intended to cover the general “migration” process.

The final dependent library that wasn’t able to support .NET Core was GeoCoding.net. We were using this library to perform address to coordinate lookups via Google. On review of the usages, it was again clear that we had a whole dependency for what amounted to a single call to a Google endpoint. We were already calling another part of the Google REST API directly from a custom service class, so again, the decision was to wrap up the geocoding functionality in our own code, calling the API directly. Again, the exact details are beyond my scope here, but I may cover this in a future blog post if there’s interest.

Handling API Differences

With the problem packages removed I tried to compile the solution. I was immediately hit by a wall of errors. This was initially a little daunting, but after looking through them I could see that many were quite similar and due to changes to the .NET Core API surface.

Reflection

The first of which was where we’d been using reflection. We have a couple of places in the web app that rely on reflection for wiring up our IoC container and also in some of the test classes. In .NET Core the Object.GetType() method no longer returns full type detail information, instead it returns just the type name. In order to access the full type information there is a new extension method called GetTypeInfo(). It returns TypeInfo which is similar to what Type used to return.

Before:

After:

In this example you can see that the only change is adding in the GetTypeInfo call.

Date Formatting

We also had some code calling ToLongDateString on dates. This is no longer avaiable so I switched to formatting the date using the ToString method instead.

Before:

After:

Exceptions

In a couple of places we were throwing ApplicationException which also seems to have been removed. I switched to a general Exception in this case.

Before:

After:

Final Tweaks

Once all of the compile errors were fixed we were nearly there. In order to enable the site to be run under the non IIS mode of Kestrel I updated the profiles in launchSettings.json

Before:

After:

This new profile basically tell VS to run the project (i.e. via dotnet.exe) – launching it on port 5000. Within Visual Studio you can choose whether to start via IIS Express or directly into the project via the dotnet.exe. New projects targeting .NET core include these two profiles automatically, so updating it in our project felt sensible, to make the developer experience familiar.

Conclusion

With the above steps completed the project was now compiling, tests were running and the site worked as expected. Quite a few hours of work went into the process. The longest time was spent building the new service wrappers around the 3rd party REST APIs so that I could get rid of incompatible dependencies. The actual project and code changes weren’t too painful and it was just a case of working out the API changes so I knew how to modify our code.

It was an interesting experience and once we had it tested on a Mac and Linux during the NDC London code-a-thon it was very exciting to see it working. This has made it much easier for non-Windows developers to contribute to the allReady project and is just one of the great new benefits of working with .NET Core and ASP.NET Core.

The post Migrating from .NET Framework to .NET Core appeared first on Steve Gordon.
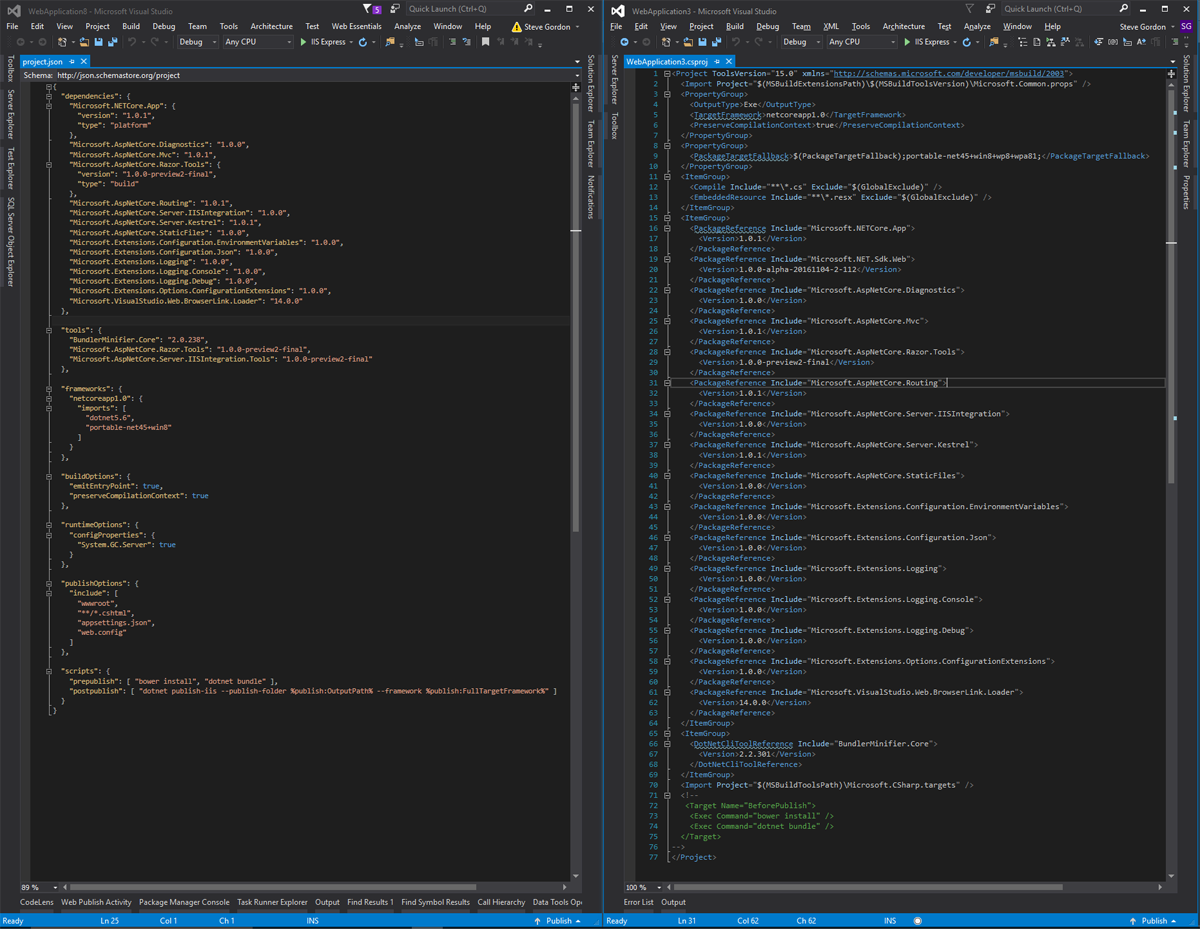
Viewing all 170 articles
Browse latest View live